Hello everyone...
Just wanted to wish you all a safe and Happy Holiday season. Sorry for being lax in the articles lately. Life has been hectic the past month. We sold our house, we're building a new one so we are packing and moving everything into storage and all sorts of good stuff like that. Becky (the wife) only has a couple more weeks left in the pregnancy so it's likely that she will be born during this time of move to make things even more crazier over here. Then I am finishing up last minute wedding albums and fulfilling holiday orders for my 2010 photography clients.
But anyone who knows me knows that this is how I roll. If it isn't complete chaos then I had nothing to do with it ;)
I will keep you all posted with when workshops and new articles will be released.
Happy Holidays!
Mike
Learn Digital Photography and How to Master Wedding and Portrait Photography by Michael Alan Bielat
12.10.2010
10.22.2010
Advanced Lighting with Speedlights
Want to start "making" photos instead of simply "taking" photos? One of the best ways to start is to incorporate some advanced lighting techniques with your flash (or flashes).
Shooting with available lighting is great and all and can really do the trick. As a matter of fact I made a career out of it for a couple years until I could afford some flashes myself.
STEP 1 - BABY STEPS:
You have to crawl before you can walk and definitely before you can run... The same goes for flash photography. It is a whole new ballgame that can really mess with your current understanding of ISO, Aperture and Shutter Speed and how they work with one another. With that in mind, start off with your flash mounted on your camera. Practice fill flash techniques and practice bounce flash techniques. The good news is that you should be able to start shooting in darker locations with better results. This is true even if you have inexpensive variable aperture "kit" lenses. Simply play around with TTL mode and work on riding your flashes' exposure compensation. Not enough flash? Increase the exposure compensation. Too much flash? Dial it down and try again. I would definitely suggest using manual mode for setting your ISO, Aperture and Shutter Speed... Using Aperture Priority, Shutter Priority or Program Mode will introduce other factors that can complicate things.
STEP 2 - HIGH SPEED SYNC (AKA Auto FP)
High speed sync is something that you may have to enable on your camera and/or flash unit. Refer to your manual on how to do this. Once enabled, you will notice that you can use shutter speeds faster than 1/200" or 1/250." This is high speed sync and it removes the limitations of having to otherwise being forced to use your camera's maximum sync speed or slower (refer to your manual for this value -- it's typically 1/200" or 1/250"). High speed sync is a life saver and is what allows you to dial down intense ambient light (like the sun) and also to be able to use wide open apertures. If you didn't have this capability then you would have to bring along a studio strobe, portable AC Power Pack and triggering device so you can shoot at like ISO 100, 1/250" at F/16. High speed sync is a lot cheaper and a lot more portable!
STEP 3 - OFF-CAMERA FLASH (MANUAL MODE)
Using your flash off-camera is a great way to learn lighting. In TTL mode, the camera does it all for you and the flash output will change from shot to shot. By switching your flash to manual mode, you are essentially treating it like a studio strobe and your flash will now only fire at the output you selected. This means your light will be consistent from shot to shot to shot. This setting is great for when things are not going to move (e.g. studio, portraits, etc...) Good luck if you are shooting sports (or a little kid on the move) this way. This is also where you can try incorporating a second (or third flash). The best part here is that you do not need the top of the line flashes, or even flashes from the same brand for that matter! You can get 3-4 cheap flashes for the price of one new model, brand name flash.
Just look for flashes that can shoot in manual mode. Bonus points if it also has a PC Sync port. Otherwise, you will have to purchase some additional items like special hot shoe mounts that have a pc sync port.

You could still fire the flashes using the Nikon wireless but your flashes have to be in direct line of sight with one another in order for it to work. Consider using a PC sync cable, IR triggers or Radio triggers for added reliability.
STEP 4 - HIGH SPEED SYNC OFF-CAMERA
Take all the techniques mentioned above and roll them into one! Incorporate a couple different flashes and play around. Try setting the flashes to different exposure compensation values and experiment.
For some extra fun, throw on some light modifiers like a softbox, gel, gobo, snoot or honeycomb / grid for added effects.
Share your flash stories by commenting below.
Thanks for stopping by.
Michael
Shooting with available lighting is great and all and can really do the trick. As a matter of fact I made a career out of it for a couple years until I could afford some flashes myself.
STEP 1 - BABY STEPS:
You have to crawl before you can walk and definitely before you can run... The same goes for flash photography. It is a whole new ballgame that can really mess with your current understanding of ISO, Aperture and Shutter Speed and how they work with one another. With that in mind, start off with your flash mounted on your camera. Practice fill flash techniques and practice bounce flash techniques. The good news is that you should be able to start shooting in darker locations with better results. This is true even if you have inexpensive variable aperture "kit" lenses. Simply play around with TTL mode and work on riding your flashes' exposure compensation. Not enough flash? Increase the exposure compensation. Too much flash? Dial it down and try again. I would definitely suggest using manual mode for setting your ISO, Aperture and Shutter Speed... Using Aperture Priority, Shutter Priority or Program Mode will introduce other factors that can complicate things.
STEP 2 - HIGH SPEED SYNC (AKA Auto FP)
High speed sync is something that you may have to enable on your camera and/or flash unit. Refer to your manual on how to do this. Once enabled, you will notice that you can use shutter speeds faster than 1/200" or 1/250." This is high speed sync and it removes the limitations of having to otherwise being forced to use your camera's maximum sync speed or slower (refer to your manual for this value -- it's typically 1/200" or 1/250"). High speed sync is a life saver and is what allows you to dial down intense ambient light (like the sun) and also to be able to use wide open apertures. If you didn't have this capability then you would have to bring along a studio strobe, portable AC Power Pack and triggering device so you can shoot at like ISO 100, 1/250" at F/16. High speed sync is a lot cheaper and a lot more portable!
STEP 3 - OFF-CAMERA FLASH (MANUAL MODE)
Using your flash off-camera is a great way to learn lighting. In TTL mode, the camera does it all for you and the flash output will change from shot to shot. By switching your flash to manual mode, you are essentially treating it like a studio strobe and your flash will now only fire at the output you selected. This means your light will be consistent from shot to shot to shot. This setting is great for when things are not going to move (e.g. studio, portraits, etc...) Good luck if you are shooting sports (or a little kid on the move) this way. This is also where you can try incorporating a second (or third flash). The best part here is that you do not need the top of the line flashes, or even flashes from the same brand for that matter! You can get 3-4 cheap flashes for the price of one new model, brand name flash.
Just look for flashes that can shoot in manual mode. Bonus points if it also has a PC Sync port. Otherwise, you will have to purchase some additional items like special hot shoe mounts that have a pc sync port.

You could still fire the flashes using the Nikon wireless but your flashes have to be in direct line of sight with one another in order for it to work. Consider using a PC sync cable, IR triggers or Radio triggers for added reliability.
STEP 4 - HIGH SPEED SYNC OFF-CAMERA
Take all the techniques mentioned above and roll them into one! Incorporate a couple different flashes and play around. Try setting the flashes to different exposure compensation values and experiment.
For some extra fun, throw on some light modifiers like a softbox, gel, gobo, snoot or honeycomb / grid for added effects.
Share your flash stories by commenting below.
Thanks for stopping by.
Michael
10.20.2010
Nikon i-TTL-BL Flash Setting
I am by no means am I the most perfect amazing lighting master guru guy.
However, the one thing about me is that I am always trying to learn and re-learn stuff. For example, I was just recently taking a look at Nikon's micro-site all about their Creative Lighting System (CLS) and wanted to brush up on my TTL knowledge.
One thing jarred my memory and reminded me of something that I meant to write about for a while now-- the i-TTL BL setting. See way back in the early days of Nikon's TTL flash technology that I can remember (circa 2002), the BL in i-TTL stood for Back-Lit. Today, Nikon re-branded it by now referring i-TTL-BL as meaning BaLanced Fill-Flash!
Here is the definition from Nikon: "Nikon's i-TTL (intelligent through-the-lens) Balanced Fill-Flash automatically balances the output of the Nikon Speedlight and the scene's ambient light.
Immediately before the main flash goes off, the Speedlight fires a series of monitor pre-flashes, which convey Information about the scene's lighting to the camera. Combined with information from the camera's 3D Color Matrix metering system, the information is analyzed to adjust flash output to balance the scene's ambient light.
All of this complex processing happens in a fraction of a second, before each exposure, to provide unprecedented levels of flash precision and performance."
I always have my flash set to i-TTL BL with my SB-900s. Why? Because I want my lighting to be balanced with the ambient light... I found that Nikon's technology does an amazing job at "knowing" what is going on in front of it and compensating appropriately. Granted, it is just 1s and 0s and it can be fooled but so can anything else with camera technology. It is important to think in advance and realize how much light you need (and want) in your image. For example, do you want a little catch light in the eyes? Maybe a little fill flash to fill in some wrinkles or harsh shadows or maybe you want to do some dramatic lighting like the pic below:
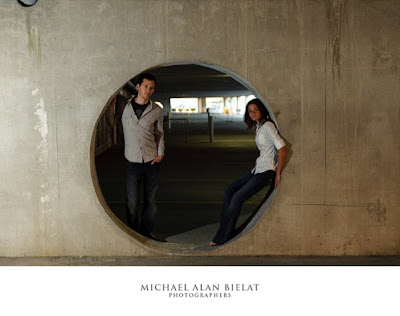
Image shot using the Nikon D700. Off Camera Flash (camera left) set to i-TTL -2ev to resemble a car headlight in this parking garage.
Attention Canon shooters: It's important to note that Canon's e-TTL II behaves in a similar way to Nikon speedlights. That's good news for you Canon flash guys.
Thanks for stopping by.
Mike
However, the one thing about me is that I am always trying to learn and re-learn stuff. For example, I was just recently taking a look at Nikon's micro-site all about their Creative Lighting System (CLS) and wanted to brush up on my TTL knowledge.
One thing jarred my memory and reminded me of something that I meant to write about for a while now-- the i-TTL BL setting. See way back in the early days of Nikon's TTL flash technology that I can remember (circa 2002), the BL in i-TTL stood for Back-Lit. Today, Nikon re-branded it by now referring i-TTL-BL as meaning BaLanced Fill-Flash!
Here is the definition from Nikon: "Nikon's i-TTL (intelligent through-the-lens) Balanced Fill-Flash automatically balances the output of the Nikon Speedlight and the scene's ambient light.
Immediately before the main flash goes off, the Speedlight fires a series of monitor pre-flashes, which convey Information about the scene's lighting to the camera. Combined with information from the camera's 3D Color Matrix metering system, the information is analyzed to adjust flash output to balance the scene's ambient light.
All of this complex processing happens in a fraction of a second, before each exposure, to provide unprecedented levels of flash precision and performance."
I always have my flash set to i-TTL BL with my SB-900s. Why? Because I want my lighting to be balanced with the ambient light... I found that Nikon's technology does an amazing job at "knowing" what is going on in front of it and compensating appropriately. Granted, it is just 1s and 0s and it can be fooled but so can anything else with camera technology. It is important to think in advance and realize how much light you need (and want) in your image. For example, do you want a little catch light in the eyes? Maybe a little fill flash to fill in some wrinkles or harsh shadows or maybe you want to do some dramatic lighting like the pic below:

Image shot using the Nikon D700. Off Camera Flash (camera left) set to i-TTL -2ev to resemble a car headlight in this parking garage.
Attention Canon shooters: It's important to note that Canon's e-TTL II behaves in a similar way to Nikon speedlights. That's good news for you Canon flash guys.
Thanks for stopping by.
Mike
10.05.2010
Hildozine PocketWizard Caddy Review
I recently sold off most of my studio strobes in favor of using my speedlights. I have enough Nikon SB-900 speedlights to create a simple studio that is fast to set up and fast to tear down, which is great for on-location lighting.
If you have ever shot with me then you know how much I love high speed sync (Auto FP). In my opinion, this is where Nikon's speedlights and technology really excel over other camera manufacturers.
However, there are times when I want to simply shoot with my speedlights in manual mode because I want a consistent flash exposure from shot to shot. This is when I break out my trusty PocketWizard Plus II Transceiver units and hook them up to the pc sync input of my speedlights.
My only problem with this was figuring out how the heck to mount these things!
Now I use the term 'was' because I found a solution. Hildozine makes something called the PocketWizard Caddy and it securely mounts your PocketWizard to your lightstand or speedlight with ease. No messy velcro to mount on your expensive equipment and no sloppily hanging cables and devices. Plus they are only $15 each!

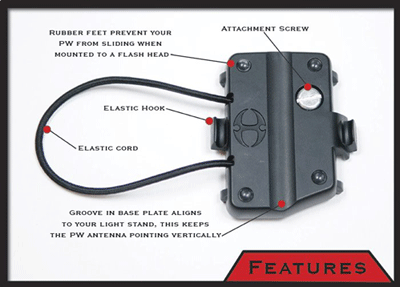
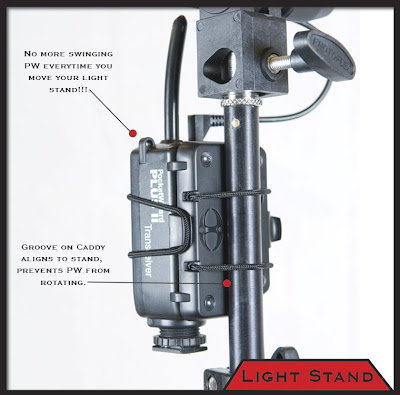
The PocketWizard Caddy is essentially a plate with a elastic cord which mounts by screwing into the 1/4" thread on the PocketWizard.
The only hiccup with the design is that it covers the battery door. Granted PocketWizards seem to run forever on the same batteries, it does make for a little added hassle when you do need to replace them.
I can now mount my PocketWizard to either my speedlights or light stand with ease. No velcro all over my equipment and no mess of bungee cords and rubber bands. It is rugged and just works.
I have a total of three PocketWizards at this time and have myself two of these caddies and really love them. These are one of those products that is nice to have and is more of a convenience than anything. Hey, for $30 you can't go wrong...
Thanks for stopping by!
Mike
If you have ever shot with me then you know how much I love high speed sync (Auto FP). In my opinion, this is where Nikon's speedlights and technology really excel over other camera manufacturers.
However, there are times when I want to simply shoot with my speedlights in manual mode because I want a consistent flash exposure from shot to shot. This is when I break out my trusty PocketWizard Plus II Transceiver units and hook them up to the pc sync input of my speedlights.
My only problem with this was figuring out how the heck to mount these things!
Now I use the term 'was' because I found a solution. Hildozine makes something called the PocketWizard Caddy and it securely mounts your PocketWizard to your lightstand or speedlight with ease. No messy velcro to mount on your expensive equipment and no sloppily hanging cables and devices. Plus they are only $15 each!


The PocketWizard Caddy is essentially a plate with a elastic cord which mounts by screwing into the 1/4" thread on the PocketWizard.
The only hiccup with the design is that it covers the battery door. Granted PocketWizards seem to run forever on the same batteries, it does make for a little added hassle when you do need to replace them.
I can now mount my PocketWizard to either my speedlights or light stand with ease. No velcro all over my equipment and no mess of bungee cords and rubber bands. It is rugged and just works.
I have a total of three PocketWizards at this time and have myself two of these caddies and really love them. These are one of those products that is nice to have and is more of a convenience than anything. Hey, for $30 you can't go wrong...
Thanks for stopping by!
Mike
10.01.2010
Video Light For Photographers
Video light rocks! It's a continuous light source which means that you can physically "see" what the light is doing. From there, all you have to do is set your exposure up just as you would if you were shooting in natural light. No need to worry about your sync speed or anything related to flash photography. It is just good, quick lighting.
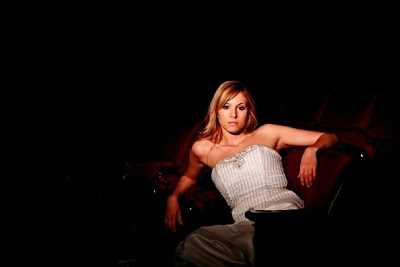
This shot was taken at an old movie theater in downtown Albany, NY. I used my generic Smith-Victor video light to illuminate my subject and worked the barn doors of the light to prevent light falling too far off of her. The video light puts out a decent amount of light so my settings were 1/60 sec. at f/2.8 @ ISO 800.
Thanks for stopping by!
Mike
9.30.2010
Honl Photo Traveller8 Softbox Review
Honl Photographic was awesome enough to send me their Traveller8 Softbox for their speed strap system in preparation for my upcoming PPA Super Monday workshop on "Off-Camera Flash Techniques." I took it out for a spin and put it through its paces and am really, really, really happy with the results.
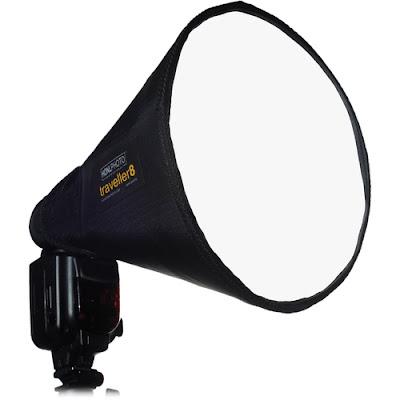
From HonlPhoto.com: "Create beautiful soft light from David's innovative new softbox design, with the quality and sturdiness you've come to expect from all Honl Photo Professional lighting products. Extremely easy to setup and attach to your shoe-mount flash unit using our popular Speed Strap (included). Folds flat to tuck into your camera bag, and weighs in at less than 4 ounces. Provides a pleasing circular catchlight in your subject's eyes. Fits most any shoe-mount flash by Nikon or Canon as well as larger units like the Vivitar 285."
The size of the softbox is roughly 11x9 inches folded and its look and feel is very rugged. It will definitely hold its own and I have confidence that it will not rip or tear even with me beating on it.
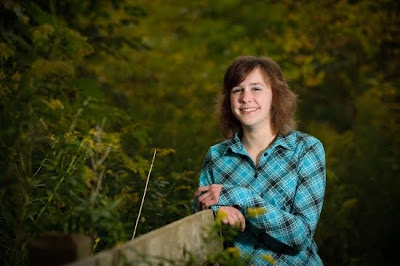
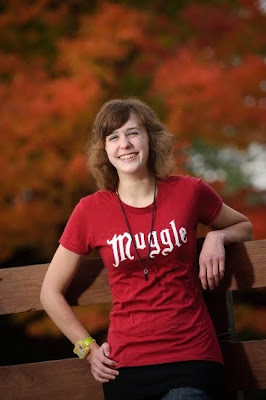
I photographed a senior portrait session over at a local park here and my setup was REAL simple. We're talking just my Nikon D700, Nikkor 70-200mm f/2.8 VR Lens, PocketWizard Plus II Transceivers, Nikon SB-900 Speedlight, Portable Light stand and the Honl Photo Traveller8 Softbox. I started shooting with a camera strap again which is nice because I can cart around my light stand with ease and throw my camera over my shoulder to free up my hands when working with my flash settings and whatnot.
Since I was using the PocketWizards, I had to shoot with my Nikon SB-900 speedlight in Manual mode. This also meant that I had to conform to my camera's maximum sync speed (1/250") and could not do any high-speed sync whatsoever.
I had to work the power of the flash, the distance between the flash and subject, ISO and Aperture to control the effect my flash had in the photo while my shutter speed simply controlled the amount of ambient light recorded. The Honl Traveller8 softbox is small enough to provide a tight light pattern on my subject and didn't really light anything that I didn't want it to. Since it is small, that also means that it won't get knocked over during windy days nearly as easy as my large 60" umbrella or 28" Westcott Apollo softbox. Due to the Traveller8's size and light pattern, I would really only use this for lighting a couple people. Any more and I would move to a larger light modifier like the 28" Apollo softbox or my 60" umbrella.
Here are some shots from the portrait session with the Traveller8 Softbox:


 />
/>
The Honl Photo Traveller8 Softbox is $70 at B&H and comes packaged with a Speed Strap so that is an added bonus.
I would highly recommend this product for it's price, portability and usefulness for on-the-go lighting. I'd love to hear your thought on it if you own one too so comment below and share your experiences.
Thanks for stopping by!
Mike

From HonlPhoto.com: "Create beautiful soft light from David's innovative new softbox design, with the quality and sturdiness you've come to expect from all Honl Photo Professional lighting products. Extremely easy to setup and attach to your shoe-mount flash unit using our popular Speed Strap (included). Folds flat to tuck into your camera bag, and weighs in at less than 4 ounces. Provides a pleasing circular catchlight in your subject's eyes. Fits most any shoe-mount flash by Nikon or Canon as well as larger units like the Vivitar 285."
The size of the softbox is roughly 11x9 inches folded and its look and feel is very rugged. It will definitely hold its own and I have confidence that it will not rip or tear even with me beating on it.
I photographed a senior portrait session over at a local park here and my setup was REAL simple. We're talking just my Nikon D700, Nikkor 70-200mm f/2.8 VR Lens, PocketWizard Plus II Transceivers, Nikon SB-900 Speedlight, Portable Light stand and the Honl Photo Traveller8 Softbox. I started shooting with a camera strap again which is nice because I can cart around my light stand with ease and throw my camera over my shoulder to free up my hands when working with my flash settings and whatnot.
Since I was using the PocketWizards, I had to shoot with my Nikon SB-900 speedlight in Manual mode. This also meant that I had to conform to my camera's maximum sync speed (1/250") and could not do any high-speed sync whatsoever.
I had to work the power of the flash, the distance between the flash and subject, ISO and Aperture to control the effect my flash had in the photo while my shutter speed simply controlled the amount of ambient light recorded. The Honl Traveller8 softbox is small enough to provide a tight light pattern on my subject and didn't really light anything that I didn't want it to. Since it is small, that also means that it won't get knocked over during windy days nearly as easy as my large 60" umbrella or 28" Westcott Apollo softbox. Due to the Traveller8's size and light pattern, I would really only use this for lighting a couple people. Any more and I would move to a larger light modifier like the 28" Apollo softbox or my 60" umbrella.
Here are some shots from the portrait session with the Traveller8 Softbox:


 />
/>The Honl Photo Traveller8 Softbox is $70 at B&H and comes packaged with a Speed Strap so that is an added bonus.
I would highly recommend this product for it's price, portability and usefulness for on-the-go lighting. I'd love to hear your thought on it if you own one too so comment below and share your experiences.
Thanks for stopping by!
Mike
9.25.2010
Thanks Honl Photographic
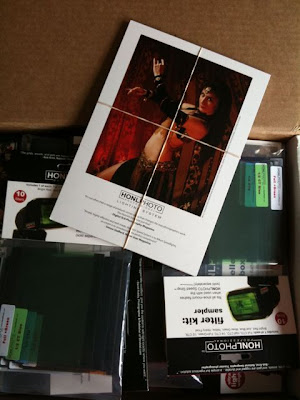
Honl Photographic was awesome enough to send over some great goodies for my upcoming PPA Super Monday Workshop all about Off-Camera Flash Techniques.
I think this means I will have to do some giveaways throughout the workshop.
This is really awesome of Honl Photographic to support the inLIGHTin Workshop like this so please check out their website at www.honlphoto.com and show some love.
Look at all the merch:
I hope to see you all on the 25th of October!
Mike
I think this means I will have to do some giveaways throughout the workshop.
This is really awesome of Honl Photographic to support the inLIGHTin Workshop like this so please check out their website at www.honlphoto.com and show some love.
Look at all the merch:

I hope to see you all on the 25th of October!
Mike
9.24.2010
Speedlights are awesome! They are portable and yet really robust as to what they offer. I guess that is why some of them run upwards to around $400+.
One of the features many have is the ability to zoom the flash head. Take my Nikon SB-900s for example, they can zoom from 12/17mm up to 200mm (on my DX/FX camera) which can give me a lot of variations of light. It is almost like a built-in snoot. Here's why: When the flash is mounted to the camera, it automatically zooms to match up with the lenses focal length and sends enough light to spread across the entire scene. Therefore, a wide-angle lens needs a lot of light spread out in order to light up everything properly. On the other hand, light needs to get thrown out, more like a "beam," when using a telephoto lens because it has to go further and cover less of the scene.
The beauty of this really comes into play when you are shooting off-camera with your flash. Take a look at the example image below:
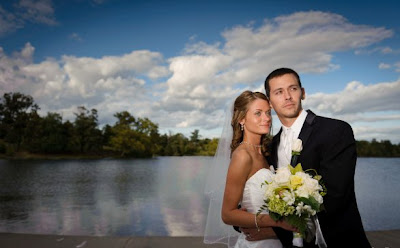
This picture was taken at a recent wedding. I used high-speed sync to darken the background and used my flash off camera to illuminate both the bride and groom. I set the speedlight to zoom all the way up to 200mm so that it would shoot a beam of light directly on the couple's faces and fall off fairly quick. This flash was held as far out as I could in my left hand as I held my camera with my right. I used my Nikon D700's pop up flash as Commander mode only to trigger the off-camera flash for me. I believe the flash was set to +1.3ev as well. My 24-70mm lens was used here because that wide angle allows me to get in close so the flash can be close enough to hit my subjects (inverse square law 101).
Moral of the story, you don't always have time to set up and light a scene the way you want to when it comes to weddings. You have to prepare and pre-plan for these things and roll with the punches. No light stand, no softbox, no assistants holding reflectors. Just me and my flash.
Thanks for stopping by!
Mike
One of the features many have is the ability to zoom the flash head. Take my Nikon SB-900s for example, they can zoom from 12/17mm up to 200mm (on my DX/FX camera) which can give me a lot of variations of light. It is almost like a built-in snoot. Here's why: When the flash is mounted to the camera, it automatically zooms to match up with the lenses focal length and sends enough light to spread across the entire scene. Therefore, a wide-angle lens needs a lot of light spread out in order to light up everything properly. On the other hand, light needs to get thrown out, more like a "beam," when using a telephoto lens because it has to go further and cover less of the scene.
The beauty of this really comes into play when you are shooting off-camera with your flash. Take a look at the example image below:

This picture was taken at a recent wedding. I used high-speed sync to darken the background and used my flash off camera to illuminate both the bride and groom. I set the speedlight to zoom all the way up to 200mm so that it would shoot a beam of light directly on the couple's faces and fall off fairly quick. This flash was held as far out as I could in my left hand as I held my camera with my right. I used my Nikon D700's pop up flash as Commander mode only to trigger the off-camera flash for me. I believe the flash was set to +1.3ev as well. My 24-70mm lens was used here because that wide angle allows me to get in close so the flash can be close enough to hit my subjects (inverse square law 101).
Moral of the story, you don't always have time to set up and light a scene the way you want to when it comes to weddings. You have to prepare and pre-plan for these things and roll with the punches. No light stand, no softbox, no assistants holding reflectors. Just me and my flash.
Thanks for stopping by!
Mike
9.21.2010
Featured on PPA.com
The Professional Photographers of America (PPA) is the world’s largest nonprofit association for professional photographers, with more than 20,000 members in 54 countries. This association seeks to increase its members’ business savvy as well as broaden their creative scope, advancing careers by providing all the tools for success...as they have since 1880.
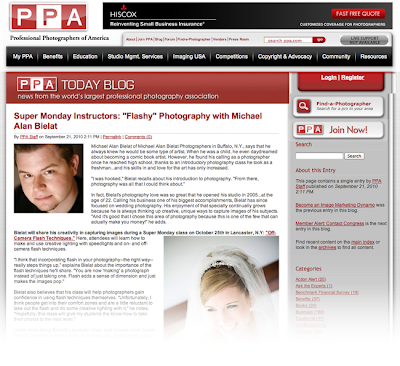
I am hosting a Super Monday Workshop for the PPA and they have chosen to feature me on their website:
Click here to read the entire article: http://www.ppa.com/ppa-today-blog/super-monday/super-monday-instructors-flash.php
Super excited about this one!
Enjoy.
Michael
I am hosting a Super Monday Workshop for the PPA and they have chosen to feature me on their website:
Click here to read the entire article: http://www.ppa.com/ppa-today-blog/super-monday/super-monday-instructors-flash.php

Super excited about this one!
Enjoy.
Michael
9.17.2010
Available Lighting
Available lighting is something that I think a lot of photographers take for granted and I am guilty of this as well...
As photographers, we buy all these cool gadgets, gizmos, light modifiers and whatever else and totally over-complicate our setup.
One of the things that is available to us, free of charge, is available light:

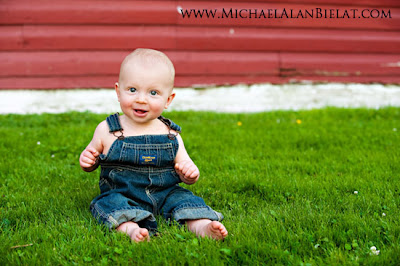
I have always tried to not book multiple outdoor portrait sessions in one single day. If you do then rock on! I prefer to shoot when the light is under that "golden hour" when the sun is setting and the light becomes softer and more easy to work with. My client gets that full hour of my time then and that light is theirs and theirs alone.
If you have ever tried doing a photo shoot under high noon sun without any overcast or shade (or worse, in a park with trees) and you will know what I am talking about! It takes A LOT more work to even out that light that you simply don't have to put yourself through. Sure you could cart along studio strobes, large diffusion tents, a staff of 12 assistants to shield the light but why bother if you don't have to??? Good luck if you are photographing children... Try moving at their speed with all that equipment!
When I was starting out I had a Nikon D100 D-SLR, two entry level lenses (variable aperture of like f/3.5 to f/5.6) and one speedlight (Nikon SB-800). I didn't have millions of things to work with yet I still got the job done. I did this by being prepared and booking my portrait sessions at logical times when the light was right.
guess what? YOU CAN TOO!
Just put your subject in a shady area or use window light to your advantage for amazing results. If your shooting outdoors, add a little fill flash (-1 ev to start) to create a catch light in the eyes for good measure.
Book some portrait jobs, build the portfolio (blog or website), book more jobs from the portfolio and keep racking in the $$$. With money you can start to upgrade your equipment. You will know what you NEED (not WANT) simply through remembering the struggles that you encounter when doing your portrait assignments. It is a slow process but a worthwhile one since debt sucks!
Available lighting... Use it!
Thanks for stopping by!
Michael
As photographers, we buy all these cool gadgets, gizmos, light modifiers and whatever else and totally over-complicate our setup.
More stuff = more problems.
This is one of the big reasons why I am downsizing all my gear for 2011. I used to think that golf had a ton of wacky gizmos but now I am thinking that photographers have them beat!One of the things that is available to us, free of charge, is available light:


I have always tried to not book multiple outdoor portrait sessions in one single day. If you do then rock on! I prefer to shoot when the light is under that "golden hour" when the sun is setting and the light becomes softer and more easy to work with. My client gets that full hour of my time then and that light is theirs and theirs alone.
If you have ever tried doing a photo shoot under high noon sun without any overcast or shade (or worse, in a park with trees) and you will know what I am talking about! It takes A LOT more work to even out that light that you simply don't have to put yourself through. Sure you could cart along studio strobes, large diffusion tents, a staff of 12 assistants to shield the light but why bother if you don't have to??? Good luck if you are photographing children... Try moving at their speed with all that equipment!
When I was starting out I had a Nikon D100 D-SLR, two entry level lenses (variable aperture of like f/3.5 to f/5.6) and one speedlight (Nikon SB-800). I didn't have millions of things to work with yet I still got the job done. I did this by being prepared and booking my portrait sessions at logical times when the light was right.
guess what? YOU CAN TOO!
Just put your subject in a shady area or use window light to your advantage for amazing results. If your shooting outdoors, add a little fill flash (-1 ev to start) to create a catch light in the eyes for good measure.
Book some portrait jobs, build the portfolio (blog or website), book more jobs from the portfolio and keep racking in the $$$. With money you can start to upgrade your equipment. You will know what you NEED (not WANT) simply through remembering the struggles that you encounter when doing your portrait assignments. It is a slow process but a worthwhile one since debt sucks!
Available lighting... Use it!
Thanks for stopping by!
Michael
Honl Speed System Review
Honl Photo http://www.honlphoto.com has some really cool light modifiers that I have been using for quite some time now. The Speed Strap system is for flashes / speedlights only. They are portable, rugged and really fun to play with.

Honl's Speed Strap system also has other accessories like color correction filter kits, color effect filter kits, gobos and a really cool 11x9" Traveler8 round softbox ($70) that I am drooling over.
The closest thing I have to the softbox is the Westcott Apollo 28" softbox but man does that guy take up some space even when it isn't folded up. Additionally, you need the flash to be off-camera AND mounted to an umbrella adapter and light stand for it all... Not my idea of "portable."


There isn't much to say about these things except for that they are REALLY great. The speed strap is essentially one long thin-ish Velcro strap (soft side on outside, rough side on inside) that you wrap around your flash head.
Easy to put on, easy to take off.
From there, you use the speed strap to mount the various light modifiers that I mentioned above.

Yes, the speed strap itself is essentially an overpriced Velcro strap but it looks good, holds up well and can be used for so much more than just the Honl stuff.
For example, it can stay mounted on your speedlight and hold your RadioPopper PX transmitter unit in lieu of having to physically mount a strip of velcro to your flash head. You can also hook up a PocketWizard to some velcro and strap it on the Honl and run a PC sync to PC sync cable on your camera (that is IF you have a PC sync input like on the Nikon D700) and fire BOTH your speedlight AND a studio strobe at the same time... Crazy lighting possibilities all with the help of Velcro. So yeah that Speed Strap is well worth the extra couple bucks then having to ghetto rig one yourself.
If you own an entry level flash such as the Nikon SB-400, Nikon SB-600, Canon 430EX, etc which doesn't have a bounce card then you can still save a ton of money and get the Honl speed strap and bounce card for around a hundred less then having to upgrade to a better flash unit... Great way to keep your equipment and get the most out of it. I was going to do a post on making one yourself using some foam paper found at a craft store but screw it, get a Honl and it will do wonders (and won't look like an art school project from hell)
Two big thumbs up for the Honl Speed System. Highly recommended. Check out Honl Photo's website at: www.honlphoto.com
PS, I will be rocking out the Honl Speed System at my PPA sponsored Super Monday workshop that deals with "Off Camera Flash Techniques." Come on by and try them out for yourself.
Thanks for stopping by!
Michael
- I am the owner of the Honl Speed Strap system and a couple accessories of theirs:
- Honl Speed Strap: $10
- Honl Speed Snoot/bounce card reflector - 8": $30
- Honl Speed Grid 1/8": $30
Honl's Speed Strap system also has other accessories like color correction filter kits, color effect filter kits, gobos and a really cool 11x9" Traveler8 round softbox ($70) that I am drooling over.
The closest thing I have to the softbox is the Westcott Apollo 28" softbox but man does that guy take up some space even when it isn't folded up. Additionally, you need the flash to be off-camera AND mounted to an umbrella adapter and light stand for it all... Not my idea of "portable."
There isn't much to say about these things except for that they are REALLY great. The speed strap is essentially one long thin-ish Velcro strap (soft side on outside, rough side on inside) that you wrap around your flash head.
From there, you use the speed strap to mount the various light modifiers that I mentioned above.
Yes, the speed strap itself is essentially an overpriced Velcro strap but it looks good, holds up well and can be used for so much more than just the Honl stuff.
For example, it can stay mounted on your speedlight and hold your RadioPopper PX transmitter unit in lieu of having to physically mount a strip of velcro to your flash head. You can also hook up a PocketWizard to some velcro and strap it on the Honl and run a PC sync to PC sync cable on your camera (that is IF you have a PC sync input like on the Nikon D700) and fire BOTH your speedlight AND a studio strobe at the same time... Crazy lighting possibilities all with the help of Velcro. So yeah that Speed Strap is well worth the extra couple bucks then having to ghetto rig one yourself.
If you own an entry level flash such as the Nikon SB-400, Nikon SB-600, Canon 430EX, etc which doesn't have a bounce card then you can still save a ton of money and get the Honl speed strap and bounce card for around a hundred less then having to upgrade to a better flash unit... Great way to keep your equipment and get the most out of it. I was going to do a post on making one yourself using some foam paper found at a craft store but screw it, get a Honl and it will do wonders (and won't look like an art school project from hell)
Two big thumbs up for the Honl Speed System. Highly recommended. Check out Honl Photo's website at: www.honlphoto.com
PS, I will be rocking out the Honl Speed System at my PPA sponsored Super Monday workshop that deals with "Off Camera Flash Techniques." Come on by and try them out for yourself.
Thanks for stopping by!
Michael
9.15.2010
Host A Photography Workshop In Your City
I am making a vow to make 2011 the year of inLIGHTment!
Hosting a workshop is a great way (FREE) way to get an amazing photographic eduction that is in your neck of the woods. To host an inLIGHTin Workshop, all you have to do is pick a location (such as a home or photography studio) and get people to attend. You are rewarded for your hard work by receiving a FREE Workshop Ticket (a $350+ value) and some great goodies from the inLIGHTin Workshop and sponsors.
If you are interested in having The inLIGHTin Workshop come to your hometown and do a photography workshop then all you have to do is email me at: inlightinworkshop(at)gmail(dot)com and we can get the ball rolling.
I will reply back ASAP to answer any questions and to make all the necessary arrangements.
Thanks for your support. I look forward to taking a trip to your neck of the woods in 2011!
Michael
9.09.2010
Online Photography Workshops
I did some final testing last night and things are ready to roll.
I am now offering Online inLIGHTin Workshops so you can improve your photography right from the comfort of your own home (and on your time). I have a lot of readers from across the globe and this allows for you all to experience the same learning that all the locals are bragging about.
These online workshops are are done using Skype because it is free software for Windows and Macs and allows us to not only video chat but share our screens as well (which is great for post-processing and workflow lessons).

I will be offering these Online One-On-One inLIGHTin Photography Workshops for a price of $50 per hour for a limited time only. Workshop topics can consist of anything of your choosing (photography 101, lighting techniques, posing, post processing, workflow, business, etc...).
Contact me at inlightinworkshop (at) gmail (dot) com if you have any questions and to schedule a workshop. Payment is due beforehand and is non-refundable.
Keep on shooting!
Mike
I am now offering Online inLIGHTin Workshops so you can improve your photography right from the comfort of your own home (and on your time). I have a lot of readers from across the globe and this allows for you all to experience the same learning that all the locals are bragging about.
These online workshops are are done using Skype because it is free software for Windows and Macs and allows us to not only video chat but share our screens as well (which is great for post-processing and workflow lessons).
I will be offering these Online One-On-One inLIGHTin Photography Workshops for a price of $50 per hour for a limited time only. Workshop topics can consist of anything of your choosing (photography 101, lighting techniques, posing, post processing, workflow, business, etc...).
Contact me at inlightinworkshop (at) gmail (dot) com if you have any questions and to schedule a workshop. Payment is due beforehand and is non-refundable.
Keep on shooting!
Mike
9.03.2010
Photoshop... In Camera
I have been revisiting a lot of my old wedding and portrait photography in preparation of getting them touched up, re-sized and re-branded when I came across one of my favorite shots. This one was taken back in April of 2008 and that is Sherri and Tom that you see there. This photo really goes to show you how an artists technique and know-how can turn the ordinary into extraordinary to create memorable images that just "Wow". Who needs Photoshop, this 'blur' effect was done entirely in-camera. No Photoshop was used to achieve that effect here people!
So how the heck did I shoot this photo?
First off, Sherry and Tom were in on this... There guests were not. They didn't know the specifics though. All I did was tell them that I requested the DJ to play a slow song and I want them to stand still on the dance floor embracing and looking at one another until I give them the go ahead.
There reception was held at a location where they had a second floor balcony around the place. I had my Giottos tripod setup there already and waiting for me to snap the camera on.
Next was my camera settings. I needed to take a properly exposed photo but had to ensure that the shutter speed was slow enough so I that moving subjects would blur some. I was using Canon at that time. I had my Canon 5D set to ISO 400, aperture at f/2.8 and shutter speed was 1 second... THAT shutter speed setting is what gave me the blur effect. My focal length was 70mm and I was using either the Canon 24-70mm f/2.8 lens for it. This was all shot with ambient light and no flash was used at all.
I ran upstairs, hooked up my camera to the tripod and took the shot. Since the bride and groom were standing still, there was little to no blurring of them. All the dancing couples on the other hand had no idea and were moving around so they were blurry...
I DID use SOME Photoshop BTW. All I did was add a vignette and cropped in a little.
You might be asking why did I use ISO 400 and why did I choose that combo? Well, because it was a dark reception venue and I wanted to introduce blur while also having a clean file. ISO 400 seemed right to me. I could have also shot this at any number of settings:
For example:
- 1" @ f/4 and ISO 800
- 1/2" @ f/2.8 and ISO 800
- etc..
Long story short, there are many ways to take a properly exposed photograph. Where we, the photographer, come into play is in deciding on how we want to portray what we are photographing... If you are a sports shooter and want the sports player to freeze in time, then do everything in your power to have a fast shutter speed (e.g. use fast f/2.8 or less lenses and higher ISO). If you shoot landscapes then maybe you want to blur the water in a stream or waterfall. Use a slow shutter speed there...
Thanks for stopping by!
Mike
8.22.2010
New Nikon D3100
Nikon recently announced a new camera body and three lenses for 2010. The camera sounds great but only one lens appeals to me and that is the new 85mm f/1.4 lens.
The Nikon D3100 has some real great bells and whistles and is quite the entry level camera! Decent low light performance as well. I think that the coolest features happen to be the higher resolution, the fact that it shoots 1080P video and that there is auto focus (finally) when shooting video!
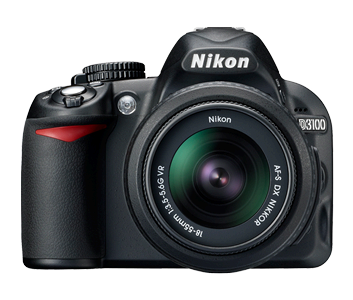
* 14.2 Megapixels
* 3" LCD
* Live View
* HD 1080p Video w/ Sound & Autofocus
* 11-point Autofocus
* 3 Frames per Second Shooting
* ISO 100 to 3200 (Expand to 12800-Hi2)
* Self Cleaning Sensor
* EXPEED 2, Image Processing Engine
* Scene Recognition System
The Nikon D3100 is available for pre-order over at B&H Photo for under $700. If I was just starting out then you better believe that this would be the camera that I would get! Click HERE to pre-order.
The Nikon D3100 has some real great bells and whistles and is quite the entry level camera! Decent low light performance as well. I think that the coolest features happen to be the higher resolution, the fact that it shoots 1080P video and that there is auto focus (finally) when shooting video!

* 14.2 Megapixels
* 3" LCD
* Live View
* HD 1080p Video w/ Sound & Autofocus
* 11-point Autofocus
* 3 Frames per Second Shooting
* ISO 100 to 3200 (Expand to 12800-Hi2)
* Self Cleaning Sensor
* EXPEED 2, Image Processing Engine
* Scene Recognition System
The Nikon D3100 is available for pre-order over at B&H Photo for under $700. If I was just starting out then you better believe that this would be the camera that I would get! Click HERE to pre-order.
8.10.2010
I would have to say that 90% of all photography businesses have a dreaded "slow" season. Slow is definitely a term that is loosely used. To some, it may mean NO business while others may only have monthly sales averages that are still in the thousands... Whatever the case may be, it stinks!
Here are some tips for getting the most out of your slow season:
1.) Take A Loss. A loss leader that is! The economy is tough these days so people may not be knocking down the doors begging for your business. Get your name out there, come up with sales or events that will drive traffic your way. Maybe consider doing some promotions that serve as loss leaders. Wikipedia defines a loss leader as "a product sold at a low price (at cost or below cost) to stimulate other, profitable sales. It is a kind of sales promotion, in other words marketing concentrating on a pricing strategy." So get people in the door at cost and get them to purchase prints and products afterwords.
2.) Focus On Your Marketing. Take a step back and plan out your goals and how you will achieve them. Plan out a full year's worth of marketing on your calendar. This means everything from due dates to email blast / mailing dates. Color code them and be sure to stick to your guns! We all know how postponing something one day leads to another... and another.... and another. You get the point. Having this in effect will ensure that next year, you get steady business coming in because you planned for it.
3.) Do Some Charity Work. It is always great to do something for others. Why not do some photo shoots where proceeded go to a worthwhile charity? It will make you feel great about yourself and will get your face out there in the community.
4.) Create. Put a couple orders in for some new sample products for the year and show them off on your blog or web site. Combine that with a loss leader promotion that we talked about already and you may have a hit on your hands. This could be anything from new products to new props or photo shoot ideas.
5.) Write. Get yourself involved in the photography community. Post photos, tips and tricks or write articles for various web sites and become a known face in the industry. It can help get you some street cred while showing your clients that you mean business.
6.) Learn. Attend a seminar, workshop or webinar. Join a photography forum or even buy a photography book. I am far from perfect with my photography but one of my strengths is that I am always learning... I am like a sponge when it comes to photography and am always picking up new things.
7.) Network. Go and meet with other vendors in your industry or niche market. Wedding photographers; meet with cake vendors, florists and videographers. Portrait photographers; visit boutique toy and clothing stores along with other places that cater to the caliber or clients you want to have. It takes time to do this so start building your network sooner rather than later.
8.) Update Your Portfolio. Now is the best time to add pics to your slideshows, web site and blog and get your latest and greatest work into rotation. You should always be improving so show potential clients your best work. This can sometimes be like pulling teeth but is a necessary evil and will pay off if you do the time.
9.) Do Some Spring Cleaning. Did you do some impulse buying last year? Have you upgraded your equipment or computer? Hit up eBay and sell some of your stuff that is just collecting dust so you can keep some coin in your bank account.
10.) Post a comment below. Let me know if you have some good tips on how you keep productive and busy during the slow season...
Hope this helps! Thanks for stopping by.
Mike
8.02.2010
Instaproofs.com Review
I was never big on image hosting companies probably because I have always been burned in the past. I started off using Imagequix which was great but then moved to Pictage because all the "rock star" photographers were using them.
I have had some real big issues with Pictage back in 2006-2007 so I made the move to collages.net where I stayed for a couple years. Business was picking up in 2008 and my first year promotion with collages.net was up so I switched back to Pictage (under new management. I can vouch that they did clean things up since then and are now actually great to work with). I made the switch back because I was looking to outsource some of my work like album design and print fulfillment which was well worth it. Now, that I re-branded once again as Michael Alan Bielat Photographers I am focusing less on the quantity of weddings that I shoot and more on the quality of weddings that I shoot. This involved a considerable price increase for my wedding photography services and whatnot. I am not imagining to be shooting 30+ weddings with this price increase so I didn't want to be locked into a contract with an online proofing company which I may or may not use as much as I used to... That was the only reason why I left Pictage once again.

So that left me in the market once again with needing a new image hosting company. Enter instaproofs.com! First and foremost, it is FREE to host your images with them. That's right F-R-E-E! Secondly, they have a great user interface that is intuitive to the users and allows for you to sell your prints even. No they don't have a full team to design albums for you or to handle your print fulfillment but man FREE is a tough thing to pass up!
How it works: You set up an account with instaproofs.com All you have to do is create an event and then you can use their drag and drop user interface to add images to the event. You can even FTP the images to them directly if you have more than 50 or so. A couple clickity clicks and that's it, the event is live. You can set an expiration date, add a password to the event and a whole slew of other things. You even get to add a promotion like 25% off prints to try and boost print sales.
The only gotcha with this FREE hosting thing here is that Instaproofs does take 15% out of your print sales to help keep them alive. This is great because they don't get paid unless you do. It is a real nice way to help them out so they can continue doing what they do without you being tied to any contracts or monthly payments. For example, I just got a print order for $330 and Instaproofs received around $50 out of that. No problem whatsoever in my book because I didn't have to pay a monthly fee. I don't know about you but I do not rely on my print sales from weddings or events that I shoot. I consider these a "bonus" and put it towards equipment purchases or fun stuff for the family. Since I don't rely on it, that means it isn't super important so this free hosting is great! Here is what they say on their website: "Instaproofs does what it can to maximize your time, and minimize your costs. Your 15% (maximum) commission goes to pay for the credit card processing fees, merchant account fees, image storage costs, site improvements, unlimited uploading and downloading bandwidth, stellar tech support, multiple order management tools, automated email marketing, etc."
The second gotcha is that YOU need to do the print fulfillment yourself. I am cool with this because I love WHCC so I had no problem finding a reason to use them more. I was going to use WHCC's Pickpic service and pay their one time $1500 fee to do so but they recently switched over to monthly payments so that was out of the questions. Now I get affordable image hosting AND I get to use the print lab that I love. Win-win in my book. I use WHCC's ROES interface to place the order and have the prints drop shipped directly to the buyer.
So I cannot recommend instaproofs.com enough. I never had to use their Customer Service but they are a pleasure to work with. You get to set your own prices and you get to rake in print sales without ever worrying about paying for monthly plans.
For more info, visit instaproofs at www.instaproofs.com
~Mike
I have had some real big issues with Pictage back in 2006-2007 so I made the move to collages.net where I stayed for a couple years. Business was picking up in 2008 and my first year promotion with collages.net was up so I switched back to Pictage (under new management. I can vouch that they did clean things up since then and are now actually great to work with). I made the switch back because I was looking to outsource some of my work like album design and print fulfillment which was well worth it. Now, that I re-branded once again as Michael Alan Bielat Photographers I am focusing less on the quantity of weddings that I shoot and more on the quality of weddings that I shoot. This involved a considerable price increase for my wedding photography services and whatnot. I am not imagining to be shooting 30+ weddings with this price increase so I didn't want to be locked into a contract with an online proofing company which I may or may not use as much as I used to... That was the only reason why I left Pictage once again.
So that left me in the market once again with needing a new image hosting company. Enter instaproofs.com! First and foremost, it is FREE to host your images with them. That's right F-R-E-E! Secondly, they have a great user interface that is intuitive to the users and allows for you to sell your prints even. No they don't have a full team to design albums for you or to handle your print fulfillment but man FREE is a tough thing to pass up!
How it works: You set up an account with instaproofs.com All you have to do is create an event and then you can use their drag and drop user interface to add images to the event. You can even FTP the images to them directly if you have more than 50 or so. A couple clickity clicks and that's it, the event is live. You can set an expiration date, add a password to the event and a whole slew of other things. You even get to add a promotion like 25% off prints to try and boost print sales.
The only gotcha with this FREE hosting thing here is that Instaproofs does take 15% out of your print sales to help keep them alive. This is great because they don't get paid unless you do. It is a real nice way to help them out so they can continue doing what they do without you being tied to any contracts or monthly payments. For example, I just got a print order for $330 and Instaproofs received around $50 out of that. No problem whatsoever in my book because I didn't have to pay a monthly fee. I don't know about you but I do not rely on my print sales from weddings or events that I shoot. I consider these a "bonus" and put it towards equipment purchases or fun stuff for the family. Since I don't rely on it, that means it isn't super important so this free hosting is great! Here is what they say on their website: "Instaproofs does what it can to maximize your time, and minimize your costs. Your 15% (maximum) commission goes to pay for the credit card processing fees, merchant account fees, image storage costs, site improvements, unlimited uploading and downloading bandwidth, stellar tech support, multiple order management tools, automated email marketing, etc."
The second gotcha is that YOU need to do the print fulfillment yourself. I am cool with this because I love WHCC so I had no problem finding a reason to use them more. I was going to use WHCC's Pickpic service and pay their one time $1500 fee to do so but they recently switched over to monthly payments so that was out of the questions. Now I get affordable image hosting AND I get to use the print lab that I love. Win-win in my book. I use WHCC's ROES interface to place the order and have the prints drop shipped directly to the buyer.
So I cannot recommend instaproofs.com enough. I never had to use their Customer Service but they are a pleasure to work with. You get to set your own prices and you get to rake in print sales without ever worrying about paying for monthly plans.
For more info, visit instaproofs at www.instaproofs.com
~Mike
PPA Super Monday Off-Camera Flash Techniques Curriculum
Just a quick update on the PPA Super Monday class which I will be teaching. The title of the course is "Off-Camera Flash Techniques" (reference course # NY20) and we will be covering the following in depth. Yes, I will be covering on-camera flash techniques as well. It will be taught by yours truly and I cannot wait. I am counting down the days. Here is the info:
Date: Monday, October 25th, 2010
Time: 9:00am to 5:00pm
Location: My Studio in Lancaster, NY.
Price: $99
CLICK HERE TO REGISTER. (Reference Course #NY20)
We will be breaking for lunch and dinner (30 min each). Models will be on-hand so you can immediately start applying what you learned here and try out these techniques. I will teach, demonstrate and then let you try it out yourself. I will be available at that time to answer questions. The number of models available depends on the number of students so that you can all have some shooting time.
If you aren't already aware, I am a Nikon shooter and will be demonstrating with Nikon equipment. I did used to be a Canon shooter so I will be able to help you out with your questions and whatnot so no worries ;)
*Not mandatory.
I am really looking forward to this event. It's sponsored by the Professional Photographers of America. If you are a photographer and are NOT a member then you owe it to yourself to become one! I hope to see you all there. If you are a member then I believe that you get yourself a merit point for attending which looks great on your PPA portfolio.
Here are the details once again:
Date: Monday, October 25th, 2010
Time: 9:00am to 5:00pm
Location: My Studio in Lancaster, NY.
Price: $99
CLICK HERE TO REGISTER. (Reference Course #NY20)
~Mike
Date: Monday, October 25th, 2010
Time: 9:00am to 5:00pm
Location: My Studio in Lancaster, NY.
Price: $99
CLICK HERE TO REGISTER. (Reference Course #NY20)
- Off-Camera Flash Techniques Curriculum:
- Introduction
- Photo 101 - Crash Course (shutter speed, aperture, ISO)
- Speedlight Crash Course (modes, settings, features, etc.)
- Bounce Flash Techniques (on camera)
- Fill-Flash Techniques (on and off camera)
- Manual Flash Photography (off camera)
- Portable Studio Lighting with Speedlights (off camera)
- TTL (Through The Lens) Flash Photography (on and off camera)
- High Speed Sync Flash Techniques (on and off camera)
We will be breaking for lunch and dinner (30 min each). Models will be on-hand so you can immediately start applying what you learned here and try out these techniques. I will teach, demonstrate and then let you try it out yourself. I will be available at that time to answer questions. The number of models available depends on the number of students so that you can all have some shooting time.
If you aren't already aware, I am a Nikon shooter and will be demonstrating with Nikon equipment. I did used to be a Canon shooter so I will be able to help you out with your questions and whatnot so no worries ;)
- WHAT TO BRING:
- Yourself.
- Digital SLR.
- Lenses (one or more).
- Notebook and pen.
- Speedlight(s).
- Flash accessories and light stand(s)*
*Not mandatory.
I am really looking forward to this event. It's sponsored by the Professional Photographers of America. If you are a photographer and are NOT a member then you owe it to yourself to become one! I hope to see you all there. If you are a member then I believe that you get yourself a merit point for attending which looks great on your PPA portfolio.
Here are the details once again:
Date: Monday, October 25th, 2010
Time: 9:00am to 5:00pm
Location: My Studio in Lancaster, NY.
Price: $99
CLICK HERE TO REGISTER. (Reference Course #NY20)
~Mike
I'm A PPA Super Monday Instructor

CLICK HERE TO REGISTER FOR THE CLASS
Coming to a Studio Near You (or more like me)
(Lancaster, NY)—Many people have an interest in photography, but how many actually have the skills and knowledge to become a professional? On Monday October 25, 2010 at 9:00 AM), Michael Alan Bielat of Paramour Photography in Lancaster, New York will be sharing his expertise as a professional photographer, helping you learn and fine-tune both on and off-camera techniques, such as fill flash, bounce flash.
Michael's class, "Off-Camera Flash Techniques", is part of a nationwide educational event by Professional Photographers of America (PPA). Called Super Monday—as the majority are held on Mondays—these classes have been a huge success each year. Known for individual and focused attention, Super Monday features educational classes on diverse topics around the country, hosted by professional photographers.
“Newcomers to our photographic events are pleasantly surprised at the warm welcome they receive and the openness of sharing success stories,” commented Ron Nichols, PPA’s 2009-10 President. Indeed, photographers who attended similar classes in the past have raved about the new skills and improvements to their businesses.
Join Michael to learn and fine-tune both on and off-camera techniques, such as fill flash, bounce flash and how to use speedlights and light modifiers to create a portable studio on the go. You’ll also get hands-on experience by photographing models.
Discover more about Michael's Super Monday class at www.ppa.com.
Michael Alan Bielat is a 27 year old professional wedding and portrait photographer located in Buffalo, NY and has over 13 years of experience behind the camera. He is also the founder of The inLIGHTin Workshop which provides online education and workshops to photographers of all skill sets.
Professional Photographers of America (PPA), a worldwide association, exists to assist its over 22,000 members in achieving their professional, artistic, and fraternal goals; to promote public awareness of the profession; and to advance the making of images in all of its disciplines as an art, a science and a visual recorder of history. For more information, visit www.ppa.com.
Contact: Michael Alan Bielat
(716) 491-8854; inlightinworkshop@gmail.com
UPDATE:
Pre-registration for Super Monday Fall 2010 will open on August 2, 2010. Sign up by October 11th, and get this full day of instruction for $99. On-site registration (day of) is $120, space permitting. PPA members earn one merit toward a degree.
Click here to Register (Reference Class #NY20): http://www.ppa.com/education-events/sm_new.php
Want more information on PPA's Super Monday? If so, then visit the PPA website here for their FAQ: http://www.ppa.com/education-events/sm/faqs.php
Downsizing My Equipment For 2011
Anyone who knows me knows how I like to spend! It seems like I have every photography gadget and gizmo out there! Over the past couple months I have been considering downsizing and going with the "less-is-more" approach to my photography. I know that the internet and forums make it real easy to want to buy everything that is out there but trust me! You only need a couple things to be able to take amazing photos. The rest is up to you to make your images sing!
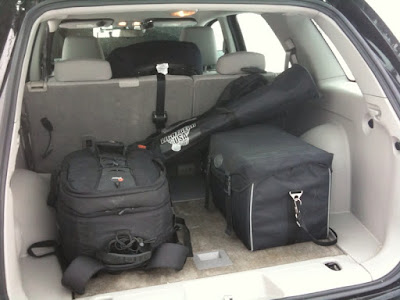
I haven't made any drastic decisions yet but have been really considering selling my Alienbees studio strobes, Hasselblad medium format camera, gizmos and even a couple lenses (email me if interested).
It all fits in my bag, it is all nice and versatile and it simply works! I rarely do studio stuff anymore and don't feel like carting around all my studio strobes and ac power packs when doing shoots. It takes longer to setup and I feel that it can be overkill. I can pull off almost anything and everything with the gear listed above and don't have to worry about carting more stuff along.
You may be asking why I am cutting back...
Good question, see over the years I have fallen into the black hole of marketing and felt that I needed anything and everything that is out there. If it's new then it has to be the best... Well, a lot of that junk accumulated over time and I had too much stuff. There was no way I could use it all at a photo shoot. So I am going back to my roots and am minimizing my lenses and what I take with me to my photo shoots. Less is more...
Thanks!
~Mike

I haven't made any drastic decisions yet but have been really considering selling my Alienbees studio strobes, Hasselblad medium format camera, gizmos and even a couple lenses (email me if interested).
- I think my 2011 setup will simply be the following:
- Nikon D700 DSLR + Nikon MB-D10 Battery Grip
- Nikon 14-24mm f/2.8 Lens for wide angle shots
- Nikon 24-70mm f/2.8 Lens (my all around lens)
- Nikon 70-200mm f/2.8 VR Lens (for telephoto and portraits)
- Nikon 50mm f/1.4G Lens (shallow DOF portrait lens)
- Two Nikon SB-900 Speedlights (high speed sync is my friend)
- Two RadioPopper PX Units (high speed sync is my friend)
It all fits in my bag, it is all nice and versatile and it simply works! I rarely do studio stuff anymore and don't feel like carting around all my studio strobes and ac power packs when doing shoots. It takes longer to setup and I feel that it can be overkill. I can pull off almost anything and everything with the gear listed above and don't have to worry about carting more stuff along.
You may be asking why I am cutting back...
Good question, see over the years I have fallen into the black hole of marketing and felt that I needed anything and everything that is out there. If it's new then it has to be the best... Well, a lot of that junk accumulated over time and I had too much stuff. There was no way I could use it all at a photo shoot. So I am going back to my roots and am minimizing my lenses and what I take with me to my photo shoots. Less is more...
Thanks!
~Mike
7.31.2010
inLIGHTin'ed Lightroom Presets Now LR 3 Optimized
Has anyone given Adobe's Lightroom 3 a run yet? It has been out for a little while now and I have been working on my inLIGHTin'ed Presets to get them optimized for it.
Well, great news everyone, my inLIGHTin'ed Lightroom Presets are now ptimized for Lightroom 3!!!
Please email me at inlightinworkshop@gmail.com if you purchased the old presets and I will gladly get you an upgrade free of charge. Just be sure to reference your e-Junkie / Paypal transaction # and I will get it to you ASAP. I am also really pleased to announce that I have been using e-Junkie to handle all the payments and also to provide you with an immediate download link. No more waiting for me to get to a computer and email you them. I know I hate waiting for stuff and I am guessing you do to.
If you don't have the inLIGHTin'ed Presets yet then now is your time to jump on-board! With presets such as "Instant Awesomeness" and my "Nostalgia" effects, you'll be sure to save a boat load of time in post-processing and a lot more time having a life... And there are 70+ more presets that I didn't even touch upon that will rock your world. If you own Lightroom (Win or Mac version) then you can use these presets.
You can purchase the inLIGHTin'ed Presets by clicking on the button below:
PRICE: $75

Thanks!
Michael
PS. Be sure to comment below and let me know what you think of LR 3 or even let me know how you like your inLIGHTin'ed Lightroom Presets.
Well, great news everyone, my inLIGHTin'ed Lightroom Presets are now ptimized for Lightroom 3!!!
Please email me at inlightinworkshop@gmail.com if you purchased the old presets and I will gladly get you an upgrade free of charge. Just be sure to reference your e-Junkie / Paypal transaction # and I will get it to you ASAP. I am also really pleased to announce that I have been using e-Junkie to handle all the payments and also to provide you with an immediate download link. No more waiting for me to get to a computer and email you them. I know I hate waiting for stuff and I am guessing you do to.
If you don't have the inLIGHTin'ed Presets yet then now is your time to jump on-board! With presets such as "Instant Awesomeness" and my "Nostalgia" effects, you'll be sure to save a boat load of time in post-processing and a lot more time having a life... And there are 70+ more presets that I didn't even touch upon that will rock your world. If you own Lightroom (Win or Mac version) then you can use these presets.
You can purchase the inLIGHTin'ed Presets by clicking on the button below:
PRICE: $75
Thanks!
Michael
PS. Be sure to comment below and let me know what you think of LR 3 or even let me know how you like your inLIGHTin'ed Lightroom Presets.
6.28.2010
Essential Off-Camera Lighting Gear
I have been really minimizing my equipment over the past couple months and following the KISS (keep it simple stupid) approach to my photography. I thought golf was bad but I really think that photography has more gear and gadgets than anything else.
I used to bring out the big artillery for my wedding and portrait assignments and a lot of it wasn't needed. Sure a studio strobe and AC power pack is nice to have... But my speedlights and high speed sync techniques can also do the trick. Throw in some nice light modifiers such as a soft box or shoot through umbrella and I'm in business.
I did add the prices to show you how much each item goes for. As you can see, it can get expensive!
Want to save a bit of money? If you shoot Nikon then you can do without a second SB-900 speedlight if your Digital SLR has a pop up flash and is fairly current. You can use the pop up flash to act in Commander mode only and trigger your one SB-900 that way. This will also allow you to get away from needing those two PocketWizards. Let's tally that up for a savings in the ballpark of $797.95! The only con here is that you are going to be limited by the flashes and they need to have a direct line of sight. BUT you get to use high speed sync which is an amazing thing if you get the hang of it!
I used to bring out the big artillery for my wedding and portrait assignments and a lot of it wasn't needed. Sure a studio strobe and AC power pack is nice to have... But my speedlights and high speed sync techniques can also do the trick. Throw in some nice light modifiers such as a soft box or shoot through umbrella and I'm in business.
- So here is my list of what I found to be essential equipment for off camera flash photography:
- Bowens Portable Light Stand ($48.95)
- Manfrotto Swivel Umbrella Adapter ($29.50)
- Impact 60" Convertible Umbrella ($29.95)
- Westcott Apollo Softbox For Speedlights ($114.95)
- (2x) PocketWizards Plus II Transmitters ($169.00 each)
- Nikon shooters should pick up the following:
- (2x) Nikon SB-900 Speedlight ($459.95)
- Canon shooters unfortunately need an extra transmitter:
- (2x) Canon 580EX II Speedlight ($445.95)
- Canon ST-E2 Transmitter ($229.95)
I did add the prices to show you how much each item goes for. As you can see, it can get expensive!
Want to save a bit of money? If you shoot Nikon then you can do without a second SB-900 speedlight if your Digital SLR has a pop up flash and is fairly current. You can use the pop up flash to act in Commander mode only and trigger your one SB-900 that way. This will also allow you to get away from needing those two PocketWizards. Let's tally that up for a savings in the ballpark of $797.95! The only con here is that you are going to be limited by the flashes and they need to have a direct line of sight. BUT you get to use high speed sync which is an amazing thing if you get the hang of it!
5.07.2010
Introduction To Digital Photography
As you may or may not know, I frequently host very rudimentary photography classes in the community. These are for clubs, organizations and even schools. I'm not good at many other things so this is something that I can do togive back to the community that I love so much. On that note, if you are reading this and think that a photography class (intro or advanced) would be great for your club or organization then shoot me an email at inlightinworkshop at gmail dot com.
As a matter of fact, I will be teaching an Introduction To Digital Photography class at our local Gilda's Club of Western New York today from 6:00pm-8:00pm. This class will be talking all about the basics of digital photography and is heavily geared towards point and shoots (what to look for, how to use one, etc...)
Way back when, I got the chance to try out Prezi which absolutely blows Microsoft's Powerpoint out of the water. If you do ANYTHING that involves public speaking or giving presentations then I would highly stress that you try out Prezi.
Anywho, I embedded the Prezi Presentation for everyone to check out at their own leisure.
Types of Digital Cameras
Camera Features
Bells & Whistles
ISO, Aperture & Shutter Speed
Camera Settings
Post-Processing
Prints & Products
Post-Processing
Composition
~ Enjoy!
Mike
As a matter of fact, I will be teaching an Introduction To Digital Photography class at our local Gilda's Club of Western New York today from 6:00pm-8:00pm. This class will be talking all about the basics of digital photography and is heavily geared towards point and shoots (what to look for, how to use one, etc...)
Way back when, I got the chance to try out Prezi which absolutely blows Microsoft's Powerpoint out of the water. If you do ANYTHING that involves public speaking or giving presentations then I would highly stress that you try out Prezi.
Anywho, I embedded the Prezi Presentation for everyone to check out at their own leisure.
- It covers:
~ Enjoy!
Mike
5.01.2010
Before You Buy That Lens...
... you heard me.
Before you lay down the cash on your next lens consider purchasing something that will make your images look better.

The device pictured above is one of the many monitor calibrators that are out there today. I included a picture of the ColorMunki by X-Rite and it is my personal favorite. The ColorMunki is affordable (under $400) and not only allows you to calibrate your monitor, your projector and even your printer as well. This is great because you are ensuring that your images are accurate from capture (use a gray card) to your screen and finally to the print. What you see is definitely what you get.
So why am I stressing a monitor calibrator over getting that new camera or lens that you have been drooling over? Simple. I want your past, present and future images to look good. Chances are that your monitor is not properly calibrated so all the images that you have been editing on it are probably way off from what their true colors should be. They may look good to you on the screen but wait until you get a print back of one!
Here's the nitty gritty details on why you should calibrate your monitor:
All computer monitors are not created equal. The settings and colors are pretty out of whack by default. The big problem comes down to when you are editing your pictures. Say you used a gray card and took a properly exposed image using an accurate white balance setting... Great. However, you may get back to your computer and the image will appear too cold or too warm. Definitely not how you saw it on your camera's LCD... So you have no worries and make the image warmer or cooler and then send it off to print.
When you get the print back it is totally screwy and the colors are WAY too cool or WAY too warm. Must be your camera right? Time to get a new one... WRONG!
It is because your monitor was fooling you into thinking your image was incorrect. You over compensated when you shouldn't have and the only way you can tell is in your print.
A monitor calibrator ensures that this does not happen anymore. All you have to do is re-calibrate your screen every month and you should be all set and on your way to better looking pictures.
A monitor calibrator will prevent your images from looking, well... like crap. See, back in the film days, your photo lab would process and develop your film for you. They were your post-processors and you didn't have to do a thing. With digital, WE are each on our own. Now if you don't have a monitor calibrator then you have not been
Before you lay down the cash on your next lens consider purchasing something that will make your images look better.
The device pictured above is one of the many monitor calibrators that are out there today. I included a picture of the ColorMunki by X-Rite and it is my personal favorite. The ColorMunki is affordable (under $400) and not only allows you to calibrate your monitor, your projector and even your printer as well. This is great because you are ensuring that your images are accurate from capture (use a gray card) to your screen and finally to the print. What you see is definitely what you get.
So why am I stressing a monitor calibrator over getting that new camera or lens that you have been drooling over? Simple. I want your past, present and future images to look good. Chances are that your monitor is not properly calibrated so all the images that you have been editing on it are probably way off from what their true colors should be. They may look good to you on the screen but wait until you get a print back of one!
Here's the nitty gritty details on why you should calibrate your monitor:
All computer monitors are not created equal. The settings and colors are pretty out of whack by default. The big problem comes down to when you are editing your pictures. Say you used a gray card and took a properly exposed image using an accurate white balance setting... Great. However, you may get back to your computer and the image will appear too cold or too warm. Definitely not how you saw it on your camera's LCD... So you have no worries and make the image warmer or cooler and then send it off to print.
When you get the print back it is totally screwy and the colors are WAY too cool or WAY too warm. Must be your camera right? Time to get a new one... WRONG!
It is because your monitor was fooling you into thinking your image was incorrect. You over compensated when you shouldn't have and the only way you can tell is in your print.
A monitor calibrator ensures that this does not happen anymore. All you have to do is re-calibrate your screen every month and you should be all set and on your way to better looking pictures.
A monitor calibrator will prevent your images from looking, well... like crap. See, back in the film days, your photo lab would process and develop your film for you. They were your post-processors and you didn't have to do a thing. With digital, WE are each on our own. Now if you don't have a monitor calibrator then you have not been
4.27.2010
Stop Using Program Mode!
There are well over 2.5 million people out there who own a digital SLR camera... That is absolutely awesome! Digital SLRs are where it's at! Sure they are bigger and bulkier but they produce a much better image overall and allow you to do a whole heck of a lot more than what a point and shoot can. However, they are only better when you throw a little know how into the mix.... If you take the camera out of the box and keep it at Full Auto or Program Mode then you are really limiting the camera's true potential and are essentially just making it one big, overpriced point and shoot.
There are three main camera settings that will do the trick. If you memorize these three the same way you know your name, address and phone number then you will be off to a real good start.
I wrote up a nice detailed blog post about shutter speed, aperture and ISO that you should definitely check out here:
Shutter Speed, Aperture and ISO Explained
Please remember at least that there are other settings beyond Full Auto or Program Mode. It isn't all about what brand or model of camera you have either. If you have an old DSLR then it all of a sudden isn't broken or obsolete when a new model comes out... That new model will not do everything for you either. It takes time and work to be a better photographer. I have been shooting film a whole heck of a lot more lately so imagine how "obsolete" I must be with my $300 film camera??? Yet, I am getting some of my best work out of it!
Listen, If you want to make your pictures look better or if you want to take your photography to the next level then you have to play around with Manual Mode and Aperture Priority Mode. I am going to just briefly talk about Aperture Priority mode for sake of boring you to tears so listen up and listen closely.
Aperture Priority Mode is one of the camera settings on almost every digital SLR out there. 9 times out of 10 I find myself being more concerned with depth of field (or lack thereof) than worrying about motion blur or camera shake... Therefore, Aperture Priority is PERFECT! You set the ISO and you pick the ideal aperture for what you are shooting and the camera does the rest and decides on the shutter speed for you. There is a nice button on the cameras that has a little "+/-" icon on it. This is the Exposure Compensation button and you can set this to a higher or lower value and it will tell the camera that you actually want your image to be brighter or darker than what it is going to "assume" you want. I say assume because a camera is just a tool and it can (and will) get fooled. From experience, I can tell you that photographing someone who is strongly back lit requires around +2 exposure compensation and typically 0 to +1 for pretty much everything else. I am mostly a portrait photographer so my subject's are always people. Things are different if you shoot nature, wildlife or landscapes and you may need to use the negative exposure compensation.
Now you're probably asking yourself "but what should I set my aperture to? I'm scarred help me!" No worries people.
Just remember, a good rule of thumb is to set your Aperture value so that it is equal to or greater than the number of people in your picture. If there is one person in the picture then use f/1.2 or higher. If there are two people then f/2 or higher. For five people, use f/5.6 or higher and so on... If you are shooting landscapes then a good default is f/16 to ensure that everything is in focus.
The only hurdle you may encounter with this guideline is that your lens may not allow you to go lower than f/4 or f/5.6... This is common in kit lenses that come with the camera body in a set. However, this is the beauty of being able to change out lenses. You can add to your gear slowly but surely and phase out the kit lenses in lieu of ones that do what you need them to. If you want to go a little nuts while not spending a fortune then check this lens out. It's great for portraits of your kids and stuff like that where you may want a shallow depth of field. The lens is a 50mm prime lens (no zoom). It has a fixed aperture (that won't change on you when you zoom obviously) and allows you to be able to shoot in real low light or so you can have real shallow depth of field all courtesy of that f/1.8 aperture. All this goodness for a modest price of $125 or so:
For Nikon:
Nikkor 50mm f/1.8 lens at B&H
For Canon:
Canon 50mm f/1.8 Lens at B&H
For Sony:
Sony 50mm f/1.8 Lens at B&H
B&H Photo Video has the best prices and I use them all the time so they are a great company with great customer service. You can't get that off eBay or from a no name company that no one has ever heard of. Stick with the companies who are legit whenever you consider picking up new camera gear.
That's all I have for today. Thanks for stopping by!
~Mike
There are three main camera settings that will do the trick. If you memorize these three the same way you know your name, address and phone number then you will be off to a real good start.
I wrote up a nice detailed blog post about shutter speed, aperture and ISO that you should definitely check out here:
Please remember at least that there are other settings beyond Full Auto or Program Mode. It isn't all about what brand or model of camera you have either. If you have an old DSLR then it all of a sudden isn't broken or obsolete when a new model comes out... That new model will not do everything for you either. It takes time and work to be a better photographer. I have been shooting film a whole heck of a lot more lately so imagine how "obsolete" I must be with my $300 film camera??? Yet, I am getting some of my best work out of it!
Listen, If you want to make your pictures look better or if you want to take your photography to the next level then you have to play around with Manual Mode and Aperture Priority Mode. I am going to just briefly talk about Aperture Priority mode for sake of boring you to tears so listen up and listen closely.
Aperture Priority Mode is one of the camera settings on almost every digital SLR out there. 9 times out of 10 I find myself being more concerned with depth of field (or lack thereof) than worrying about motion blur or camera shake... Therefore, Aperture Priority is PERFECT! You set the ISO and you pick the ideal aperture for what you are shooting and the camera does the rest and decides on the shutter speed for you. There is a nice button on the cameras that has a little "+/-" icon on it. This is the Exposure Compensation button and you can set this to a higher or lower value and it will tell the camera that you actually want your image to be brighter or darker than what it is going to "assume" you want. I say assume because a camera is just a tool and it can (and will) get fooled. From experience, I can tell you that photographing someone who is strongly back lit requires around +2 exposure compensation and typically 0 to +1 for pretty much everything else. I am mostly a portrait photographer so my subject's are always people. Things are different if you shoot nature, wildlife or landscapes and you may need to use the negative exposure compensation.
Now you're probably asking yourself "but what should I set my aperture to? I'm scarred help me!" No worries people.
Just remember, a good rule of thumb is to set your Aperture value so that it is equal to or greater than the number of people in your picture. If there is one person in the picture then use f/1.2 or higher. If there are two people then f/2 or higher. For five people, use f/5.6 or higher and so on... If you are shooting landscapes then a good default is f/16 to ensure that everything is in focus.
The only hurdle you may encounter with this guideline is that your lens may not allow you to go lower than f/4 or f/5.6... This is common in kit lenses that come with the camera body in a set. However, this is the beauty of being able to change out lenses. You can add to your gear slowly but surely and phase out the kit lenses in lieu of ones that do what you need them to. If you want to go a little nuts while not spending a fortune then check this lens out. It's great for portraits of your kids and stuff like that where you may want a shallow depth of field. The lens is a 50mm prime lens (no zoom). It has a fixed aperture (that won't change on you when you zoom obviously) and allows you to be able to shoot in real low light or so you can have real shallow depth of field all courtesy of that f/1.8 aperture. All this goodness for a modest price of $125 or so:
For Nikon:
Nikkor 50mm f/1.8 lens at B&H
For Canon:
Canon 50mm f/1.8 Lens at B&H
For Sony:
Sony 50mm f/1.8 Lens at B&H
B&H Photo Video has the best prices and I use them all the time so they are a great company with great customer service. You can't get that off eBay or from a no name company that no one has ever heard of. Stick with the companies who are legit whenever you consider picking up new camera gear.
That's all I have for today. Thanks for stopping by!
~Mike
4.10.2010
Shutter Speed, Aperture And ISO Explained
Who could imagine that these three terms could stump so many people? I don't know about you but I wanted to control the camera ASAP when I starting off and didn't want my camera to control me. So turn your camera off auto 'P'ilot and let me help you get a grasp on shutter speed, aperture and ISO once and for all. Ready to turn that dial to Manual mode???
First off, these three settings are meant to be used in conjunction with one another. It is one big balancing act where you focus on one setting over the others in order to do different effects with your image. They are to photographers what various paint brushes are to painters.
I will talk about each setting in the order in which they should be addressed before you take a photo.
ISO: Also known as ASA back in the film days. This is the first setting you should address when you pick up your camera. The ISO is something that you set based upon what you see. If it is real bright and sunny outside then you will want to use a LOW ISO number like 100. As the natural light around you gets darker, maybe you are in the shade or indoors, then there is less ambient light so you will need to use HIGHER ISO values like 400, 800 or more. The ISO is a setting that you control based upon your surroundings. In case you care, the ISO is your film's (or digital sensor's) sensitivity to light. The lower the number means the more light needs to be used to affect the exposure. Just remember, that the higher the ISO is, the crummier the image may look due to noise and grain to being introduced.
Aperture: The next setting you should move to is the Aperture. Aperture is a the one trouble setting that is VERY hard to understand. The aperture is measured in f-stops. The higher this value is means that less and less light is entering the camera. The higher the value also means that more and more of what you are photographing will be in focus. If you are still confused then just remember that your Aperture should be set to a number that is equal to or greater than the number of people you are photographing. If you are taking a picture of your dog or child then you can use an aperture of f/1.4 or higher. If you are shooting both your dog AND child then you should use f/2.8 or higher. If it is a family portrait of FIVE family members then you should set your camera to f/5.6 or greater... Get the picture? This should hopefully help you demystify the elusive aperture!
Shutter Speed: This is all that's left now that you have two of the three settings figured out... This is the home stretch. The shutter speed is what freezes or blurs motion. Sometimes you want your image to convey motion or sometimes you want everything as sharp as a tack. Since two settings are already figured out all you really need to care about it looking at your the light meter that you can see in your viewfinder.
TANGENT: The light meter is your bread and butter. It is simply an indicator of how your image is going to look if you take the picture with those settings. If the needle on the light meter is too far to the negative then your image will be too dark and vice versa if the needle it to the plus. I typically aim for +0.3 or +0.7 for the most part.
So with this in mind, set the shutter speed to either a higher number (to center the light meter if you have too much light) or lower one (to let in more light) until the needle in the light meter is centered. The only thing you need to check is if the shutter speed is less than 1/60" of a second. Anything slower will introduce camera shake and your image will suffer. Just make sure your over 1/60 and you should be good to go for just starting off. If you simply cannot keep your shutter speed over 1/60" then this is a good indication that you don't have your ISO set up properly. Go back to the drawing board and use a higher ISO and go from there.
Still need more light? Move to a brighter location or throw a flash on your camera.
Hope this helps!
Mike
3.29.2010
Going Prime
Yes, I am a Nikon shooter... Yes, I am using prime lenses... and yes, Nikon does make fast prime lenses.
Believe it or not, you don't have to be a Canon user to enjoy prime lenses. Yeah you got me on the fact that Canon has some gorgeous f/1.2 lenses out there but Nikon is no slouch either!
As you may or may not know (or care) my wife and I work together and she has been my associate shooter for quite some time now. She was always used to using primes since way back in the day so she kept with that while I shot with almost all zooms... If you are married, and are lucky enough to work with your significant other, then you should REALLY be familiar with the saying; "What's mine is yours."
So, long story short she was a prime hog ;)
That was all fine and dandy until Rebecca took a year off to brew and raise our son, Cameron. It was during that time that daddy got to play!
I fell in love with primes all over again and passed the zoom lenses to the wife for the rest of 2009 throughout...
They are lighter, sharper (yeah that's possible, even with Nikon's über sharp zoom lineup) and allow me to really utilize my camera's amazing low-light shooting capabilities. The shallow DOF (depth of field) is also a great way to help tell a story as well. Take this shot for example:
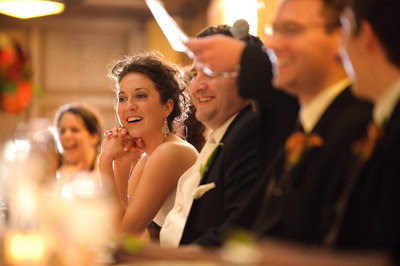
So you may ask yourself, do I still use the zooms?
Yeah... I do. The only time you will be seeing me with zoom lenses is typically during the wedding ceremony's processional / recessional and at the reception when I am shooting the cake cutting and guest's when they are dancing. I still break out the 70-200mm zoom as well since I still don't have that 135mm prime (can Nikon beef up stock on these please??). So at this time I am probably using prime lenses 75-80% of the time.
MY CURRENT EQUIPMENT LINEUP (As of March 2010)
Cameras:
(2x) Nikon D700 DSLRs
(1x) Nikon D300 DSLR
Zoom Lenses:
(1x) Nikon 14-24mm f/2.8
(2x) Nikon 24-70mm f/2.8
(1x) Nikon 70-200mm f/2.8 VR
Prime Lenses:
(1x) Nikon 24mm f/2.8
(1x) Nikon 35mm f/2.0D
(1x) Nikon 50mm f/1.4G
(1x) Nikon 85mm f/1.4
(1x) Nikon 85mm f/1.8
(1x) Nikon 105mm f/2.8 VR Macro
(1x) Sigma 300mm f/2.8
Speedlights:
(3x) Nikon SB-900
(2x) Nikon SB-800
Alienbee Studio Lighting
PocketWizards
RadioPoppers
I'm still looking for that Nikon 135mm f/2DC Lens and am eying up the Nikon 200mm f/2.0 VR lens to add to my lineup.
Believe it or not, you don't have to be a Canon user to enjoy prime lenses. Yeah you got me on the fact that Canon has some gorgeous f/1.2 lenses out there but Nikon is no slouch either!
As you may or may not know (or care) my wife and I work together and she has been my associate shooter for quite some time now. She was always used to using primes since way back in the day so she kept with that while I shot with almost all zooms... If you are married, and are lucky enough to work with your significant other, then you should REALLY be familiar with the saying; "What's mine is yours."
So, long story short she was a prime hog ;)
That was all fine and dandy until Rebecca took a year off to brew and raise our son, Cameron. It was during that time that daddy got to play!
I fell in love with primes all over again and passed the zoom lenses to the wife for the rest of 2009 throughout...
They are lighter, sharper (yeah that's possible, even with Nikon's über sharp zoom lineup) and allow me to really utilize my camera's amazing low-light shooting capabilities. The shallow DOF (depth of field) is also a great way to help tell a story as well. Take this shot for example:

So you may ask yourself, do I still use the zooms?
Yeah... I do. The only time you will be seeing me with zoom lenses is typically during the wedding ceremony's processional / recessional and at the reception when I am shooting the cake cutting and guest's when they are dancing. I still break out the 70-200mm zoom as well since I still don't have that 135mm prime (can Nikon beef up stock on these please??). So at this time I am probably using prime lenses 75-80% of the time.
MY CURRENT EQUIPMENT LINEUP (As of March 2010)
Cameras:
(2x) Nikon D700 DSLRs
(1x) Nikon D300 DSLR
Zoom Lenses:
(1x) Nikon 14-24mm f/2.8
(2x) Nikon 24-70mm f/2.8
(1x) Nikon 70-200mm f/2.8 VR
Prime Lenses:
(1x) Nikon 24mm f/2.8
(1x) Nikon 35mm f/2.0D
(1x) Nikon 50mm f/1.4G
(1x) Nikon 85mm f/1.4
(1x) Nikon 85mm f/1.8
(1x) Nikon 105mm f/2.8 VR Macro
(1x) Sigma 300mm f/2.8
Speedlights:
(3x) Nikon SB-900
(2x) Nikon SB-800
Alienbee Studio Lighting
PocketWizards
RadioPoppers
I'm still looking for that Nikon 135mm f/2DC Lens and am eying up the Nikon 200mm f/2.0 VR lens to add to my lineup.
3.25.2010
Sync Your Camera's Time
There is nothing that I hate more than not having all my camera's time synced together. I have had this happen to me a couple times either with myself or when working with a second shooter. Maybe I was shooting with two different camera bodies or maybe I just got one back from a repair (they reset EVERYTHING on you BTW) but whatever the case may be, it stinks! It is also something that you can easily forget in the heat of the moment.
So here is what I do:
Go to www.time.gov and use that time to sync up your cameras... Yes all of them. Simply set the time on your cameras to the same thing and then hit the OK button when the time.gov website matches your cameras. Done!
When I am working with a second shooter on-location I just treat my camera like the time.gov site and have them sync up to my time. It's very simple yet often overlooked.
If you have more than two cameras then have a friend help you our or do a couple at a time.
Now there are EXIF modifier programs out there but it can be a hassle. Do it right the first time and save yourself the headache!
Thanks for stopping by,
Mike
1.10.2010
Using Auto ISO
Do yourself a favor and check to see if your camera has a feature called Auto ISO. It is really cool especially if you shoot in Aperture Priority (Av) mode.
So to backtrack a little bit, Aperture Priority mode means that all you have to do is select your desired aperture and the camera figures out what proper shutter speed it should use to give your a decently exposed image. Now I say "decent" because it isn't always dead on. By default, the camera exposes for what it assumes is 18% gray. If you have a light skinned bride in a white dress then you want her to appear light or white in the image. That is where Exposure Compensation comes into play. If you need your image is under exposed (check the histogram) then dial the exposure compensation up to +0.7 or so. Vice versa if the image is too bright.
Now you still have to set your ISO but that can be a pain OR your shutter speed may end up getting set by the camera so that it is way to slow and causes camera shake or unwanted motion blur. This is where AUTO ISO comes in handy. When you enable Auto ISO on your camera, you also set a minimum shutter speed that you do not want to go slower than. For me, I toy between 1/60" and 1/80". You also get to pick what your minimum and maximum ISO should be. This is beneficial if your camera doesn't have awesome files at higher ISOs. Simply set the maximum ISO to the best high ISO files that your camera can produce. For me, I have no problem going to ISO 6400 on my D700 as long as I can ensure my images will not be under-exposed even in the slightest.
So after you set your Auto ISO up then it is time to rock and roll. What goes on in the camera is that it takes your minimum shutter speed into consideration when it's figuring out what value to use. IF the needed shutter speed is slower than your minimum then it automatically bumps up your ISO to let in more light for you and thus, allowing you to shoot at faster shutter speeds.
Hope this helps. Please comment below if you use Auto ISO and share your thoughts. Enjoy and be inLIGHTin'ed.
1.09.2010
Getting Cheap With Your Flashes
Speedlights are EXPENSIVE!
I get a lot of questions where people ask me what flash I recommend for them. Now I am a Nikon shooter so I will be using their speedlight models while getting my point across to you all.
The most popular choices for Nikon shooters are the SB-600 and the SB-800 / SB-900 models. If you are a Canon shooter then many or all of these bells and whistles also differ between Canon's 430EX and 580EX speedlights.
First, let's address the most important thing... PRICE. The SB-600 is around $200 while the latest SB-900 comes in at around $450 and up. So far so good?
Next, the SB-600 is much smaller in both size and weight (10.6 oz. to be exact). That can be nice especially if you do not have a battery grip attached to your camera or if you have a more compact D-SLR (a la the D40, D90, etc..). The SB-900 weights in at just under a pound (14.6 oz.) and it is big! It is more solid and rugged and the hot shoe is more robust.
Now for what's under the hood. The SB-600 does have less power but not enough to be a deal breaker. Flash power is rated in what's called a guide number. The SB-600 rates in at 98 while the SB-900 rates in at 111.5 at ISO 100.
Since the SB-600 outputs less power, you get more shots with your AA batteries than with the SB-900. It is almost a 2 to 1 difference so it is pretty considerable!
The SB-600 is an older model so it supports both new and old TTL modes (i.e. i-TTL, D-TTL and Auto TTL) while the SB-900 supports only i-TTL. No biggie here unless you have an older camera model like the D100.
So far the SB-600 seems to be kicking some butt right? Now for where the SB-900 excels.
First, the lens coverage is pretty substantial. You can zoom your SB-900 all the way up to 200mm and that means you have yourself a nice range to do some creative lighting. I know that I have used the 200mm zoom to get more reach or to give the effect of having a snoot attached. To contrast, the SB-600 can only zoom to 85mm. This isn't a big deal if you don't use flashes for creative lighting or off camera flash too much.
Next, the SB-900 has the ability for the flash head to turn a complete 180 degrees left and right where the SB-600 can rotate 180 to the left but only 90 degrees to the right. This can be a pain for you bounce flash shooters like me.
You also cannot hook up an external battery pack to the SB-600 while you can use the SB-8 or 9 battery pack for more oomph and faster recycling.
In wireless TTL mode, the SB-600 can only act as a remote / slave while the SB-900 can also be a master / commander flash. If you use manual mode then you can go all the way down to 1/128 power with the SB-900 while the SB-600 only goes down to 1/64 power.
Other features that are pretty nice on the SB-900 is the ability for it to receive firmware updates, has overheat protection (which you should immediately disable), adjustable light patterns and gel filter identification.
Nikon is also nice enough to include a diffusion dome, gel filters and a built-in bounce card with the SB-900.
So what is my suggestion??? Eventually get both!
Start with the SB-600 and then keep it and get the SB-900 when you get more into advanced flash techniques. Now this suggestion goes for anyone who shoots a camera other than a flagship model like the D3s. All other models have a built in flash and many of which allow for it to act as a commander flash. D3s users do not have that built-in flash so the SB-900 is really needed simply for that commander mode feature.
1.08.2010
Nikon D700 Hot Shoe Problems
So this post is more about something to watch out for.
I have a couple D700s and have had the same problem on each of my bodies with a couple Nikon SB-900 Speedlights. What ends up happening is that the speedlight flickers and misfires when any sort of movement happens. I must have gotten flashed a hundred times last week.
The D700 is an amazing camera and its low light capabilities is just stellar. However, I still use flashes A LOT and it is a real bummer that this camera can't keep up with a heavier flash.
For the time being, I took a hammer to the hot shoe, very gently, and tapped the hot shoe flaps so they fit the speedlight tighter. I also used needle nose pliers to gently pry the metal things inside the hot shoe as well to make for a tighter fit. There is a $30 Nikon WG-AS3 Flash Water Guard which I used more to keep the flash tighter to the camera ever since this happened the first time. Unfortunately, I lost mine . A new one is on the way and hopefully that can help to further keep the D700 in working order without needing to be sent to Nikon.
Anyone else have (or had) similar problems? Comment below and share your stories.
Thanks for stopping by,
Mike
1.07.2010
Take The "Less Is More" Approach When Post Processing Images
Today's article is more advice than anything else. One thing I wish I knew when starting my photography business was "LESS IS MORE." Now, what do I mean by this?
I always tended to show more images to my clients then what was really good for the both of us...
You are really doing both of yourselves a favor when you show less images. On one side, YOU don't have to finish editing as many images and that means you can save yourself time which is huge. You can also take that extra time and do a real nice job on the images that you DO show. Now YOUR CLIENT doesn't have as many images to choose from and it makes it easier for them to pick their favorites. Do them the favor of not having them juggle between two similar faces or poses. Get it done before the viewing session and your clients will spend more time buying and less time choosing.
You are also shooting yourself in the foot if you aren't doing viewing sessions.... I will save that for another time though. That's all I have to say for today.
Thanks for stopping by. Enjoy and be inLIGHTin'ed.
Mike
1.05.2010
Catalog Your Photos
For those who shoot in RAW mode, you will want to utilize a program such as Lightroom or Apple Aperture to ensure that you can catalog your images. There are other amazing apps out there like Bridge, Capture One and or Photo Mechanic to name a few but the global favorite is Lightroom. Any program that enables cataloging and, more importantly utilize the “meta tag” feature is okay in my book. You know the saying, “different strokes for different folks”.
Meta tags essentially add text data to each of your images. Say you took a trip to Alaska. You can batch tag all the images from that trip using special keywords from which you can search upon later. Typical keywords I would use would be : Alaska, Vacation, Landscape, and so on. If I took pictures of moose, bear or waterfalls then I would tag those appropriately. You may think that this is a very cumbersome process but there is a handy “batch” feature that enables you to type something once and then it applies to all your selected images; A VERY handy feature.
Now I do a lot of speaking engagements and workshops so I need to have all my images at my finger tips. If I am doing a speech or article on off-camera lighting for example then I can do a quick search and all images that I tagged as such and they will all show up for me. That really makes it easy for me to compile some favorite images that I can use for my workshop. For those who focus more on shooting, I cannot imagine having a lifetime of work that gets lost on a hard drive. For that reason alone, I cannot think of any better way than to catalog your work so that you can access your images when needed.
If you would like to see all your vacation photos then all you have to do is type “vacation” and they will appear. To be more specific you can type “Alaska” Now this only really works if you have one uber-catalog and then a bunch of sub-folders containing each day’s shoot.
For those who have a photography business, I would also suggest tagging your client’s names and photo shoot date as well. This makes things really handy if you ever need to access them.
Another awesome feature that these apps have is rating your images. You can flag images as well as give them a star rating (typically 0 to 5 stars). In my case, I tend to flag images that are my oh la la shots and are ones that I will most likely find myself displaying on my blog, website and so on. If I have client images from a portrait session or wedding then I give the images a star rating. My rating is really based upon keepers or tossers so all I need to do is give my images zero or one star. Now It isn’t uncommon for me to shoot over 15gb of images during a wedding so those zero star images that will NEVER get used are just taking up space on my hard drive. These crappy images can add up over a year or more so I make sure to delete these images after a 6 month grace period. To do this, all I do is search a particular sub-folder in my main catalog and do a global delete to the images that have zero stars and “poof” all gone.
That about does it for today’s tip. Enjoy and be inLIGHTin’ed.
Mike
1.04.2010
When Gear Fails...
As photographers and business owners, you have to know that your gear WILL eventually fail you. It is just a matter of WHEN will it fail...
I cannot stress the importance of having backup gear and having insurance for your equipment. I have had cameras and lenses fail on me numerous times and have always ensured that I have something to fall back on.
My general rule of thumb is to keep your old camera when you upgrade. A decent D-SLR averages around $2500 but its resale value drops considerably over time. Camera lenses on the other hand, tend to retain their value much better. I have taken huge losses on D-SLRs when selling them and upgrading. Thinking back, I would much have been much better off keeping an older camera for those "just in case" moments.
So what happens if a camera acts erratically on the job?
My Nikon D700s have been great to me. However, I have had hot shoe mount issues on two different bodies. This means that my speedlight, when mounted, sometimes misfired or doesn't fire at all. In both these cases, I had to resort to alternative measures on the fly in order to finish the job. the first thing is to try and fix the equipment on site. This meant bending the hot shoe prongs or wedging something in between the flash and the hot shoe for a more "snug" fit. This got me through the day but afterwords it was off to Nikon for repair. I had this just happen to me on the New Year's Eve wedding that I shot. My flash kept popping in my face and was acting up. So I ended up using my pop up flash in commander mode and shot the rest of the day with my speedlight on a light stand with the CLS system. If I had line of sight issues then I just threw some Pocket Wizards on there and I was all set to finish off the night.
Now what happens if your equipment flat out breaks, or gets stolen on the job? I have had two lenses break on me from being dropped. It wasn't fun and I had to send them off to get repaired which can be quite costly. My most recent "oops" was my Nikkor 24-70mm which fell from about 3 feet onto carpet and literally cracked in half. It is times like this where having insurance comes into play. Because I have insurance, I now have a brand new 24-70mm sitting in front of me.
My rule of thumb here is that if you cannot afford to immediately replace something then get it insured.
If your gear is stolen then that is a really bad thing and can really be a downer. Once again the show must go on so you better have backup equipment in the car to keep things going. In order to still have your client's images at least backup your images regularly or get multiple cards that are smaller in size and keep swapping them out. The full cards can then be kept on you or in a safe spot somewhere else.
Preventative measures can be taken to prevent things from getting swiped. My personal favorite is to take a bike lock and chain up my camera bag to the DJ's table or PA system. Not going anywhere there!
Canon and Nikon shooters have certain professional services that you have to apply for which can really help for those who need gear to be repaired in a hurry. It is a pretty long process to get yourself registered with them and they do ask for a lot of info to ensure that you are a professional photographer but it is well worth it! Your gear gets top priority and that means that they can get it back into your hands faster.
Canon has their CPS: Application Here (membership fee required)
Nikon has the NPS: www.nikonpro.com (free service)
Thanks for stopping by!
Mike
Subscribe to:
Comments (Atom)