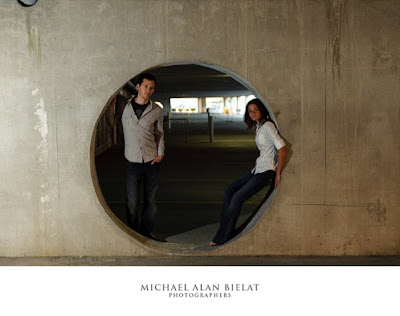
Shooting with available lighting is great and all and can really do the trick. As a matter of fact I made a career out of it for a couple years until I could afford some flashes myself.
STEP 1 - BABY STEPS:
You have to crawl before you can walk and definitely before you can run... The same goes for flash photography. It is a whole new ballgame that can really mess with your current understanding of ISO, Aperture and Shutter Speed and how they work with one another. With that in mind, start off with your flash mounted on your camera. Practice fill flash techniques and practice bounce flash techniques. The good news is that you should be able to start shooting in darker locations with better results. This is true even if you have inexpensive variable aperture "kit" lenses. Simply play around with TTL mode and work on riding your flashes' exposure compensation. Not enough flash? Increase the exposure compensation. Too much flash? Dial it down and try again. I would definitely suggest using manual mode for setting your ISO, Aperture and Shutter Speed... Using Aperture Priority, Shutter Priority or Program Mode will introduce other factors that can complicate things.
STEP 2 - HIGH SPEED SYNC (AKA Auto FP)
High speed sync is something that you may have to enable on your camera and/or flash unit. Refer to your manual on how to do this. Once enabled, you will notice that you can use shutter speeds faster than 1/200" or 1/250." This is high speed sync and it removes the limitations of having to otherwise being forced to use your camera's maximum sync speed or slower (refer to your manual for this value -- it's typically 1/200" or 1/250"). High speed sync is a life saver and is what allows you to dial down intense ambient light (like the sun) and also to be able to use wide open apertures. If you didn't have this capability then you would have to bring along a studio strobe, portable AC Power Pack and triggering device so you can shoot at like ISO 100, 1/250" at F/16. High speed sync is a lot cheaper and a lot more portable!
STEP 3 - OFF-CAMERA FLASH (MANUAL MODE)
Using your flash off-camera is a great way to learn lighting. In TTL mode, the camera does it all for you and the flash output will change from shot to shot. By switching your flash to manual mode, you are essentially treating it like a studio strobe and your flash will now only fire at the output you selected. This means your light will be consistent from shot to shot to shot. This setting is great for when things are not going to move (e.g. studio, portraits, etc...) Good luck if you are shooting sports (or a little kid on the move) this way. This is also where you can try incorporating a second (or third flash). The best part here is that you do not need the top of the line flashes, or even flashes from the same brand for that matter! You can get 3-4 cheap flashes for the price of one new model, brand name flash.
Just look for flashes that can shoot in manual mode. Bonus points if it also has a PC Sync port. Otherwise, you will have to purchase some additional items like special hot shoe mounts that have a pc sync port.

You could still fire the flashes using the Nikon wireless but your flashes have to be in direct line of sight with one another in order for it to work. Consider using a PC sync cable, IR triggers or Radio triggers for added reliability.
STEP 4 - HIGH SPEED SYNC OFF-CAMERA
Take all the techniques mentioned above and roll them into one! Incorporate a couple different flashes and play around. Try setting the flashes to different exposure compensation values and experiment.
For some extra fun, throw on some light modifiers like a softbox, gel, gobo, snoot or honeycomb / grid for added effects.
Share your flash stories by commenting below.
Thanks for stopping by.
Michael