I have a D700 with the SB800. I know how to adjust the settings to get the right flash output after I've seen in my histogram, but in a wedding a lot of times the moment is gone and you can't take a second shot.
Please give advice on how to think through the settings? How far are your subjects when you use 1/4, 1/8 power, etc? Do you constantly change your flash or do you change your distance from the subject? Bride walking aisle?
Thank You!"
Thanks for writing. I too use the Nikon D700 and have myself the Nikon SB-800 and SB-900 speedlights. The one thing that stood out to me in your question was that you were mentioning stuff like 1/4 and 1/8 power. That is leading me to believe that you have your flash set to Manual mode and not TTL (Through The Lens). Manual mode was handled a certain way back in the film days. Guide numbers, distance to subject, blah blah blah. Technology has really advanced and TTL takes away "almost" all those complicated trig functions and stuff that film photographers had to do before. I do have an article about TTL Flash work that is worth looking at for a little more background on what it does. I moved to different hosting providers so some of the images in the article are MIA for the time being. I will get those back up as soon as possible because nothing beats visual examples of all this complicated terminology. Note, this article is in regards to the flash in TTL mode and OFF CAMERA and on a light stand. Not too many differences but just be aware that things are different than on-camera flash.
So to answer your question, I don't really think at all. You can too. Just set your flash to TTL mode and give that a whirl. End of story. What happens in TTL mode is that a pre-flash is fired just before the actual flash does. This pre-flash illuminates your subject and that information is recorded by the camera. The camera takes that, plus the focal length of your lens plus your current camera settings (shutter speed, aperture and ISO) and comes up with the proper "median" flash power that will correctly light your subject. Take a look at the image and if it is slightly too dark or too light then that is where the Flash Exposure Compensation comes in handy. Dial that up or down to tell your flash "Hey, whatever you are thinking, increase or decrease it some" and it will listen and do just that. Flashes are very obedient like that.
Great question! Keep them coming!
Take care.
12.25.2009
11.25.2009
Introducing Cameron!
Sorry about my lack of updates. My wife and I have been busy being parents to are amazing little boy, Cameron Michael...
He was born on November 24th at 8:29am. Being a parent is the absolute best feeling in the world. It is hard to even imagine that I had a life without him in it...
Here are some pics of our little guy:


Mike
10.03.2009
Using High Speed Sync

High Speed Sync is a really great technology. Here is one shot that I just did where I used the high speed sync capabilities of my flash:
Shot with my Nikon D700, SB-900 mounted off camera and Nikkor 24-70mm f/2.8 Lens
SHUTTER SPEED: 1/5000" (try doing that with a PocketWizard!)
APERTURE: f/2.8
ISO: 200
FOCAL LENGTH: 28mm
Thanks for stopping by,
Mike
9.29.2009
Live Interview with me over at photoforthepeople.com
Great news! I just found out that I will be featured on www.photoforthepeople.com in a live interview. All members of the site are encouraged to log in and chat things up.
The interview will take place at 7pm EST time and should go for a couple hours. If you are a photographer of any skill set then be sure to register on the forum and be there! I will be available to answer any questions regarding photography or business.
Hope to see you all there!
Mike
The interview will take place at 7pm EST time and should go for a couple hours. If you are a photographer of any skill set then be sure to register on the forum and be there! I will be available to answer any questions regarding photography or business.
Hope to see you all there!
Mike
8.18.2009
The Bells And Whistles Inside Our Cameras
Hello all,
Sorry I have been a little lax in posting the past couple days. I am right in the heart of wedding and portrait season and have been swamped with photo shoots and whatnot.
So I was with my assistant on Saturday shooting a wedding and it dawned on me that our digital SLR's have come a REAL long way! She has herself a Pentax DSLR and she was having a real tough time with it during the reception which reminded me of how spoiled my D700 has gotten me. Some might think of them as just bells and whistles but I think that many of these can be really helpful... That is IF you know how to use them! I mean heck, Program mode could be considered the best feature that camera's have since it does everything for you pretty much... Do you think DaVinci hand drew his lines or used a ruler? Know what I mean? We are given these tools so we need to utilize them to make our life easier.
Here are some features that I am particularly fond of and use often. Some are new, some are old and some have totally different names that you just need to link up with the lingo that your camera uses. My experience is with Nikon so that is what I am going to roll with.
1.) Av Mode: It really rocks. I know what my shutter speed should be, it is just that one isn't always fast enough to get to that proper setting in time to capture "the moment". I have lost some good pics by being too slow. When I do weddings and portraits, I am really only concerned with setting my aperture and ISO. I want to set it and forget it so Av mode is where it's at for me. Now Av Mode is not the say-all-be-all and that is where item #2 comes in handy.
2.) Exposure Compensation: If your shots in Av Mode, are too bright or too dark then you need to rock the Exposure Compensation to tell the camera that you want your images to be darker or lighter than what it thinks is a good exposure. Too bright, tell the EC to dial it down by -1.0 or to brighten it up by +1.0. Digital is awesome so you can do a test shot and do the proper EC based upon the histogram and image preview... Check out #3 for a better indication on if your images are over exposed. This works for all the modes except for Manual mode... Using EC in Manual mode does give you a quick way to control your speedlights TTL flash compensation however! More on that in another article though.
3.) Highlight Warning: This feature is great for a quick indication letting you know if your image is blown out and over exposed. Little "blinkies" will fade in and out in the areas that are blown out.
4.) Auto-ISO: I know I want my shots to be above 1/60" to ensure that I am showing the least camera shake and motion blur from the subject. Auto ISO gives asks for you to set a minimum shutter speed that your camera should not go under... I set mine for 1/80" to be safe. You also get to choose a lowest and highest ISO that you want to use... This works for all the modes except for Manual mode. So how it works is that as soon as your camera sees that it needs more light and has to go under your lowest shutter speed, it just kicks up the ISO for you to get the shot... Cool huh? My D700 has a minimum of ISO 200 and a maximum of ISO 6400... Why? Because those high ISO files look darned good! I do disable auto ISO when shooting with a flash however... It throws things out of whack for me and it is too much dependencies on one another for my liking.
5.) Custom Menu / Button Assignment: Nothing is worse than having a bunch of buttons that you never use. Instead, I can allocate useful features to otherwise useless buttons on my D700... I have the buttons doing cool stuff like Virtual Horizon, Access Top Item of my Custom Menu (which is set to show my Commander Mode stuff for CLS flash work) and stuff like that.
6.) 3D Matrix Metering: I don't 'use' this much but can see it being REAL helpful for sports shooters. All you really have to do is set the AF point and keep tracking in Continuous AF and you will actually see the AF point move (showing that the AF is following) with your subject as they cross your frame! You should probably enable the 51 AF points and definitely need to use the dynamic AF control.
So those are really cool features that I use and abuse. I would really just suggest cracking open your user manual and search for those little gems that may help out when you out the next time shooting.
Thanks for stopping by,
Mike
8.12.2009
inLIGHTin'ed Lightroom Presets

PRICE: $75
 |
| 
This collection includes Over 75 Lightroom Presets and instructional video to help maximize their potential. These presets have been divided up into categories for the ease of use.
Get the Quick Fix Preset HERE
Get the Aqua Duotone Preset HERE
Get one of the Nostalgia Presets HERE
Here is a brief description of what each category entails:
QUICK FIXES: One click awesomeness! These are great presets for your proofing needs. Apply these to all your images and grab a coffee while these presets take care of everything for you.
SPECIAL EFFECTS: These help to take Photoshop out of the equation. It is called 'workflow' not 'work-slow' people!
BLACK AND WHITE: What good would presets be without killer black and white presets?
DUOTONES: These add a little spice to black and white images.
SHARPENING: Believe it or not, Lightroom actually has useful sharpening tools!
VIGNETTE: Pick your vignette tolerance and watch it go.
WHITE BALANCE: These presets help to give you instant color correction!
PRICE: $75
| Click HERE to view more Lightroom Preset Examples!
8.07.2009
Using the Gradient Filter in Lightroom
Lightroom 2 introduced a lot of amazing new features. One of which happened to be the Gradient Tool (shortcut = M). This tool basically makes it so that you can do without using a physical graduated neutral density filter. Granted, nothing beats getting the shot perfect in camera so using actual graduated neutral density filters is always encouraged. I use the Galen Rowell grad ND filters manufactured by Singh-Ray. I use these filters because they provide me with the best image hands down. Other filters by other companies can demonstrate an odd color cast and other undesirable effects.
Anyways, the Singh-Ray grad ND filters are amazing... BUT they cost around $250 each. That is the basically the price of Lightroom. So for those who want the best images without breaking the bank then look no further than shooting your images in RAW and using Lightroom's Gradient Tool. This tool is basically a digital graduated ND filter and can help to bring your sky or foreground in the same exposure range. The resulting image is one that has amazing sky and cloud detail while still having a well exposed foreground.
Another way to achieve a similar effect is to use HDR (high dynamic range) techniques. I personally think that HDR images can be too overwhelming. Look into it though and see if you like it.
YouTube video up soon!
8.03.2009
Finding Your Niche
A niche is defined as an employment, status, or activity for which a person or thing is best fitted. Finding your niche market is crucial to any business and especially for photographers! Take a step back and think about things from a consumers standpoint for a second. What if you walked into your favorite restaurant that also doubled as a mechanics garage and pet groomer. Yeah it might be convenient this is pretty far fetched. The point is that having TOO MANY options can and usually does hurt a business more than it helps. This is why niche marketing is preferred.
Speaking for myself, I would rather take my dog to a pet grooming place that specializes in pet grooming than.. I don't know, say a restaurant that also did pet grooming.
Let's put this into the realm of the photographer. Hanging a shingle out there saying that you specialize in weddings, portraits, sports, landscapes, real estate, commercial, studio and fashion photography may seem prestigious and that you are a jack of all trades but in reality, it is probably giving your clients a less than ideal view of your business. They may think; "are they hurting for money? Is that why they try to do everything and then some?"
So what should we do as photography business owners? Well, here is the cool part. WE get to pick what we want to specialize in? This is YOUR business so if you are getting business from all different areas of photography then keep it up. Otherwise, if you aren't getting the business that you want then it may be time to re-evaluate your business approach and incorporate a niche market to hone in on your specialty. All you have to do is take the stuff that you love to photograph and get rid of the rest. For me, studio photography is cool and all but I could surely do without it. I would rather do fun, candid photos outdoors... That is where my Lifestyle Portraits come into play. They are usually outdoors and are fun and allow me to capture the moments of the shoot rather than "Say Cheese" poses.
If you love baby portraits and hate weddings, then ditch the weddings and do only what you love and are passionate about. THAT will be your niche market and you will feel rejuvenated with your business because you are doing what you love and what you enjoy doing. Nothing is better than being your own boss and nothing is better than loving what you do!
Remember the saying, "Jack of all trades... Master of none." Do what you want to do, and do it well.
So what is your niche?
Thanks for stopping by,
Mike
7.31.2009
Gelling Your Lights
This is a simple tip on how you can achieve a better (and more accurate) colors with your images. Mind you, this is for when you are shooting with a speedlight (whether on or off camera) like the Nikon SB-900 or Canon 580EX II or even with studio strobes.
Let's take this down to the most basic situation where you will be using a flash to help convey my message.
So you are shooting a wedding in a normal sized room that is light with incandescent bulbs. These bulbs are giving off a warm, amber color. If we were shooting without a flash then our in-camera white balance should be set to incandescent or a custom Kelvin temp of something like 3200K or something within that range. That is all fine and dandy so shoot away.
But what happens if the room is dimly lit and you need a flash to help light things up? Flashes are daylight balanced around 5400K so what will happen is that the light from the flash will conflict with the ambient light from the incandescent bulbs and you will get various color casts on your subjects or background. Welcome to Photoshop hell at that point!
All we need to do is gel our flashes with the proper CTO filter so we can essentially modify the daylight balanced speedlight and mold it into becoming about the same Kelvin temperature of the ambient light that is around. In the situation above, an amber filter over the speedlight would bring that 5400K speedlight down to the 3200K range. DON'T FORGET TO SET YOUR WHITE BALANCE TO INCANDESCENT AND NOT FLASH!
If your white balance is still off then that is okay because you are at least in the same realm of light without worries of any serious color cast that would be noticeable. This is a very easy fix if you shoot in RAW.
Nikon's SB-900 comes with a couple gels to correct for different lighting conditions. These gels even have some intelligence to them and allows the flash to know which one is mounted. If you are shooting in Auto white balance mode then the flash can tell the camera what filter is over the flash so the camera can take the necessary actions for providing you with a fairly accurate image and color rendition. They even include a real spiffy gel filter holder that snaps on to the flash.
So what is the lesson we learned today boys and girls???
Thanks for stopping by,
Mike
7.28.2009
Nikon 105mm VR Lens Review
The Nikon 105mm VR macro lens is a relatively new addition to my camera bag. It is a very sharp specialty lens that really deserves to be recognized. The 105mm is a macro lens and the way to use it is really different from how we work with conventional lenses. I have to admit, when I put this lens on I thought it was broken. See, I put the lens on and tried stopping down to f/2.8 but couldn't. Instead, I had a very odd aperture that it was stuck at. I put two and two together and started working the manual focus ring and then figured it out and that it is just how the lens works. Being a macro lens, it is used because it provides you with a close focusing distance as well as the ability to produce 1:1, 1:2 (and so on) reproductions of your subject. This is great for flower photography, insects and stuff of that nature because you can do your cropping in camera and have the subject take up the entire frame if you so choose.
This lens can also be used as a portrait lens since it is very sharp and it is at a focal length that is flattering to your subject without any real lens distortion occurring.
There are two cons to this lens that pose a problem. The first is sort of the nature of the beast and deals with a shallow DOF (depth of field) even at higher apertures. I noticed it when I first got the lens. I started off at like f/5.6 or f/8 with flowers but noticed that the foreground leaves were still out of focus. Sure the part of the flower I focused on was 100% sharp but the DOF fell off way too soon IMHO. To combat this and get the photo that I wanted (i.e. ALL petals in focus) I had to set the aperture to f/11 or f/16... That is great and all but you need a boat load of light at times in order to get these shots. I worked my way around that by using my speedlight to compensate for the loss of light. f/11 is totally doable with a speedlight if it is very, very close to your subject. This is also where the VR (vibration reduction) comes in handy to achieve sharp images even at slower shutter speeds.
The second issue I had with the lens is that it is slow to auto focus. This lens works best when you set your focusing distance and physically move yourself and the camera back and forward until you achieve the sharpest focus. I noticed that this was a pain with a tripod!
Now imagine the trouble I had to go through to get this photo:

These bats were all huddled up and hanging on the wood rafter in a historical building in the Smokey Mountains. There was no light whatsoever. I had to have my associate hold up my iPhone to give me something, anything to illuminate these little critters. That gave my camera enough light to detect the contrast necessary to acquire focus. I had my SB-900 speedlight mounted on my camera and it was pointed directly behind me so it would hit the wall behind me and lit up the little guys... I got a couple good snaps off before I looked down and checked out that bat guano that I was stepping in. Anything for the shot right?
So back to the review. The 105mm VR is a very nice (and ridiculously sharp) lens. Remember that photo above? Well here is a 100% crop of the little bat off to the bottom right of the frame.

Yeah THAT'S sharp!
Is is necessary for 99% of the work people do? No... Well unless you photograph flowers and bugs for a living then consider yourself in the 1% range. I personally do not use this lens for portraits often. I bring it out for weddings and baby portraits to capture details. Wedding ring shots work great with the 105mm and I can get those little baby details with this lens as well. Little ears, hands and feet. The other times this lens comes out is when I do the flowers and bug photography.
It is a great lens and I would definitely recommend it.
Mike
This lens can also be used as a portrait lens since it is very sharp and it is at a focal length that is flattering to your subject without any real lens distortion occurring.
There are two cons to this lens that pose a problem. The first is sort of the nature of the beast and deals with a shallow DOF (depth of field) even at higher apertures. I noticed it when I first got the lens. I started off at like f/5.6 or f/8 with flowers but noticed that the foreground leaves were still out of focus. Sure the part of the flower I focused on was 100% sharp but the DOF fell off way too soon IMHO. To combat this and get the photo that I wanted (i.e. ALL petals in focus) I had to set the aperture to f/11 or f/16... That is great and all but you need a boat load of light at times in order to get these shots. I worked my way around that by using my speedlight to compensate for the loss of light. f/11 is totally doable with a speedlight if it is very, very close to your subject. This is also where the VR (vibration reduction) comes in handy to achieve sharp images even at slower shutter speeds.
The second issue I had with the lens is that it is slow to auto focus. This lens works best when you set your focusing distance and physically move yourself and the camera back and forward until you achieve the sharpest focus. I noticed that this was a pain with a tripod!
Now imagine the trouble I had to go through to get this photo:
These bats were all huddled up and hanging on the wood rafter in a historical building in the Smokey Mountains. There was no light whatsoever. I had to have my associate hold up my iPhone to give me something, anything to illuminate these little critters. That gave my camera enough light to detect the contrast necessary to acquire focus. I had my SB-900 speedlight mounted on my camera and it was pointed directly behind me so it would hit the wall behind me and lit up the little guys... I got a couple good snaps off before I looked down and checked out that bat guano that I was stepping in. Anything for the shot right?
So back to the review. The 105mm VR is a very nice (and ridiculously sharp) lens. Remember that photo above? Well here is a 100% crop of the little bat off to the bottom right of the frame.
Yeah THAT'S sharp!
Is is necessary for 99% of the work people do? No... Well unless you photograph flowers and bugs for a living then consider yourself in the 1% range. I personally do not use this lens for portraits often. I bring it out for weddings and baby portraits to capture details. Wedding ring shots work great with the 105mm and I can get those little baby details with this lens as well. Little ears, hands and feet. The other times this lens comes out is when I do the flowers and bug photography.
It is a great lens and I would definitely recommend it.
Mike
7.23.2009
Five Things I Wish I Knew... My Top Revelations
I was introduced to photography in High School, around 1997. Immediately fell in love with it. I rolled my own film, worked in the darkroom and did all that fun stuff. I made the switch to digital around late 2001 and that really appealed to me as well. I was majoring in computer science so digital made the inner-geek in me absolutely ecstatic. I have learned A LOT through these 12 or so years of being a photographer. There are so many things that, for lack of a better word, were revelations. I mean these things could have made my photos so much better, cut my workflow in half or even could have just made things so much easier. Want me to share my top 5 with you?
Haha I thought you would never ask...
1.) Your Light Meter Measures Everything as 18% Gray: I was fooled for the longest time on this one. I have no idea why I never read it anywhere or figured it out on my own. This was a huge "A-Ha" moment for me. Handheld and in-camera camera light meters are made to read 18% gray at the center. I always thought that the center line in the camera's viewfinder was the perfect exposure but that isn't the case. The result was me always tweaking my photos plus or minus a stop or so. If I photographed something that was bright then my photos would be under exposed and vice versa for dark scenes. So I figured out that 18% gray is meant to be the middle ground and it is up to the photographer to take that data and make good use of it. So a bride in a white dress along a white wall needs MORE light to turn that middle gray into about +1 eV on the light meter. If you have a groom in a black tux along a black wall then you need to let LESS light in so that light meter better be about -1 eV.
Digital is a beautiful thing so you can enable highlight warnings in camera and see if you are overexposing any part of the scene. If you see those "blinkies" all over your subject then that should tell you to calm your exposure down a bit...
2.) Lenses Matter: I didn't invest into good glass until about 2006. I was using kit lenses which were often very slow and had variable apertures. Slow lenses are ones that are in the f/4-5.6 f-stop range and variable aperture lenses are cheaper zoom lenses and the f-stop changes when you zoom in and out. For example, if you have an 18-200mm lens then you may be at f/4 at 18mm but when you zoom up to 200mm then you will see your minimum aperture change as well up to f/5.6... I was a Nikon shooter from 2001 to 2006. I wasn't happy with what I had and made the switch to Canon for a year. I HATED the quality control issues Canon had and made the switch back to Nikon a year or so ago. Now I am super happy with my camera equipment... What changed since going from Nikon to Canon and back? My lenses. I didn't have expensive glass the first time but did when I moved to Canon. After selling that stuff off, I bought expensive glass from Nikon and boy what a difference! My photos were sharper, my color accuracy was better out of camera and the faster lenses (some with VR or "vibration reduction" / IS or "image stabilization" for Canon shooters) made it so I could take pictures relatively anywhere. Before I had the faster lenses, it seemed like I was always somewhere that didn't have enough light to shoot at shutter speeds faster than 1/60". Anything in that range or slower means camera shake or motion blur. Not always ideal for photos! Once I got lenses in the f/1.2 to f/2.8 range then that all went out the door. Suddenly I had new shutter speeds available to me that were faster than 1/60" shutter speeds. Some fast prime lenses can get you in this ballpark with ease. A 50mm Nikon or Canon f/1.8 lens can be as cheap as $100. Check out Amazon.com for that kind of stuff because they have great deals on camera equipment. Won't break the bank and it will get you some real nice results. Makes a great birthday gift too ;)
3.) Make Backups and Backups of your Backups: I had a great time at Myrtle Beach in 2004. Took lots of killer pictures and great memories of my girlfriend (now my wife) and I. It was also a bittersweet time because my wife, Rebecca, found out that her Great Grandmother was diagnosed with cancer. I managed to get some real nice pictures of her and her great grandmother before she got real sick. Sure enough, I made only one copy of the above mentioned photos and had them on an external hard drive. Formatted my cards and went about my business shooting everything else. Well, a month later, guess what decided to become a fireball and blow up on me? THAT hard drive. Bye bye photos, bye bye memories. What did I learn? Make backups of your backups!
4.) Shoot RAW: I know there are some JPEG blow hards out there where it is all JPEG or nothing. Good for you. If you don't want to sit behind a computer after a shoot then no problem. That is about the only reason I would ever even consider shooting exclusively JPEG in this day and age. Memory cards are cheap (I remember paying $200+ for a 512mb card in 2002!), RAW converters are cheap and fast and they do the job. Even my snap shots are done in RAW. WHY? I love the flexibility and love the fact that I can apply the necessary white balance, contrast, saturation and sharpness after the shoot depending on my needs. If I shot JPEG then I would be limited to what my settings were at time of capture. Last time I checked, Photoshop has a hard time of getting a correct white balance after the fact and sharpening can always be added but rarely removed! RAW also has more flexibility. In the heat of the moment, maybe you took a beautiful picture but your settings may have been off. If you shoot in RAW and your goof ups are suddenly not throw outs. I have pulled a couple stops back from a file and made it a keeper. If I shot JPEG then it would have been off to the trash can.
5.) It's Called Workflow not "work-slow": I remember editing a wedding in 2006 using Adobe Camera Raw. I was editing every photo one by one. I knew nothing about "batch processing" That wedding took me a week and now I can get one fully edited, make a blog post about it AND push it to Pictage within 2 hours tops. RAW converters like Adobe Lightroom are great tools and should be used to their fullest. Use Lightroom Presets, Photoshop Actions and Batch Processing and watch your calendar free up in no time.
There you have it, my top 5 revelations that I know I would have liked to have learned when I started off. Hopefully these can come in handy for you and you can be off to an even better start then when I did.
Thanks for reading!
4.30.2009
Getting Down and Dirty With Off-Camera Flash: Part I
I can still remember my first run-in with flash photography... It was 2002 and I just picked up my first set of studio strobes. A good friend of mine gave me a crash course in how to use them and light modifiers and whatnot and then I threw myself to the wolves and booked my first sports portraits. It was for a karate school that I taught at and I basically took those in and out portraits of the little kids for mom and dad to get a bunch of wallets of them and send off to their relatives.
Granted, I wasn't doing any Rembrandt or butterfly lighting here... It was more like lighting for a Passport photo than anything.
Long story short, I was hooked! I ran out and picked up an SB-800 speedlight the day it came out (which was in mid-2003 I believe) That was when I had my trusty Nikon D100 with me. Man I loved that camera... I might even pick another one up just because I miss it so much. Tangent. Sorry about that. So back to the lesson... Nikon has an amazing CLS system. Even back then! Their D-TTL stuff was magical and it caused me to work my butt off freelancing so I could pick up a second one! The CLS system came even further down the road and they introduced more bells and whistles which is what you see today.
With two, I was able to do all sorts of awesome flash photography. I could essentially, take my studio on-location with portability and easy set-up/take-down to get my job done better and faster... Cool.
So, I worked on it and studied lighting more and just kept experimenting. The internet was a huge help along with various DVDs and seminars that I attended. I definitely encourage learning so soak up as much information as you can so you can be all that you can be.
On that note, I hope that these next couple flash articles will help you and get you to use your flash off the camera more.
My workshops and seminars cover all the basics so for this article, I am just going to assume that you at least know the fundamentals, camera settings and lingo that I will use.
First things first, you need to think about what you are going to use as your flash settings. The two obvious choices that I can think of is whether you will want to use the camera and flash's TTL system or if you simply want to use the flash in manual mode. There are pros and cons to using either one so let's go over what they are:
TTL FLASH: (TTL stands for "Thru The Lens" BTW)High speed sync (or FP sync for Canon shooters)... This is some awesome stuff that is worth it's weight in gold! (More that high speed sync stuff later) TTL is also very easy to use. Nikon shooters do have a little more luxury in this department and have the ability to easily tweak their flash output on all slave units from their camera. Canon users don't have such a luxury and have to purchase a ST-E2 and use light ratios to get the same effect. TTL frees us up from the old days where it seemed like every photographer also needed a quantum mechanics degree as well...


Seriously with that? Well the TTL system takes care of that and calculates the proper flash output because it knows all the variables in those equations. The result it that you have your own little math geek in your flash now!
The technology does have its limitations however. For example, you will get flaky and inconsistent results if the ambient light is too bright or when commander unit is not in sight of the slave units and stuff like that. Distance from commander to slave can also be an issue. There are products out there like the RadioPoppers and PocketWizards newest product (The TT1 and TT5) that do fix these limitations. Another issue is that this stuff is proprietary so you can only have Nikon flashes with your Nikon cameras or Canon flashes with your Canon cameras... You can see that this can get expensive at $300+ a pop for their latest flashes.
Check out this video on the Mini TT1 and Flex TT5...
MANUAL MODE: Good ol' fashioned manual mode. A lot of photographers use manual mode and I do too. However, photographers such David Hobby and Zack Arias are 110% manual mode flash... Why do that if TTL is as awesome as I say it is??? Well first off, price... The only real big purchase you would make is for at least a pair of PocketWizard's or more if you want to use more flashes. There are things known as "eBay triggers" out there which may not be the industry standard, but are 50 times cheaper than a pair of $400 PWs. Not bad! You could even get away with a long PC Sync cable and run it from your camera to your flash tethered to save some cash... Also, you aren't limited to your specific camera brand's flashes. You can pick up ANY flash that has a PC Sync input and hook it up to your wireless transmitter and you are good to go! If the flash doesn't have a PC Sync input then you can always buy a hot shoe mount that has one and daisy chain it that way to work. (PC sync cable to hot shoe mount then flash mounted on hot shoe)
So you can get away with dropping a lot less for a manual flash setup... Why else does it rock? Well, TTL does all that fancy pants trigonometry stuff to do all the busy work for you with each and every shot. That means the flash output will be or can be different with each shot or composition change that you make. This could be an issue and give you inconsistent results from one to another... It's sort of the Matrix metering system but for flashes you know? Therefore you have to ride the flash exposure compensation.
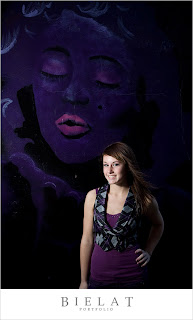
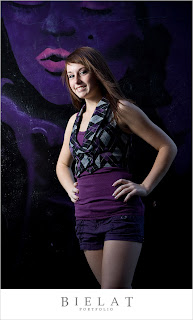
Here are a couple example images that were shot with Manual Flash:
.jpg)
We were in a tight space in this alley and I couldn't rely on my lighting system to work in TTL mode. Also, it was dark enough where I didn't need a fast shutter speed to dial down the ambient light so I hooked up my PocketWizard Plus II receivers and shot in manual mode. All I needed to do was set my flashes up once and I could spend more time shooting and less time fidgeting with my settings.
With manual flash however, you set it and forget it... Position subject at X put light stand and flash about arms length away from them at Y, dial in your settings and every shot will have the same flash output... DONE! Unfortunately, there are bad things about this setup. The most annoying issue is your camera's stupid sync speed. The way SLRs work is that the mirror flaps up and the shutter opens for x seconds and closes and then the mirror flaps down... Many cameras have a standard sync speed of 1/200", 1/250" or even a 1/500" (like on the Nikon D70s) but check your camera manual to see what yours is... It is the maximum shutter speed that you can use when shooting with a flash. Plain and simple. If you shoot at that shutter speed or slower then you are all set... Shoot faster than the sync speed and welcome to 'blacklinesinmyphotosville'. What that nice long line is at the bottom of your picture (or left or right side if shooting portrait) is that your exposure was so fast that it didn't give the image enough time to get the full effect of the flash because it closed up too quick.
All in all, as mentioned before, I use both methods. There is a time and place for both of them. I use TTL and high speed sync when I want to shoot portraits and want overpower the sun... That means I can dial down the ambient light and get really cool portraits that are just top notch... If I were to do that in manual mode then I would need a lot more flash power (enter studio strobes and power packs which cost $$$$) to get my shutter speed slow enough so that it falls into the sync speed of the camera....
So that gives you the rundown on what your options are as far as flash modes are concerned. The next part will discuss how to go about quickly set your gear up and dialing in your settings so you can spend more time shooting and less time fidgeting with your it all. Not a bad deal right?
*Sample images coming soon
Be sure to comment on this post and let me know how you use your flash. I know there is a lot more information on the subject. This is meant to be a nice general overview of things to get people started.
Thanks for stopping by!
Mike
Granted, I wasn't doing any Rembrandt or butterfly lighting here... It was more like lighting for a Passport photo than anything.
Long story short, I was hooked! I ran out and picked up an SB-800 speedlight the day it came out (which was in mid-2003 I believe) That was when I had my trusty Nikon D100 with me. Man I loved that camera... I might even pick another one up just because I miss it so much. Tangent. Sorry about that. So back to the lesson... Nikon has an amazing CLS system. Even back then! Their D-TTL stuff was magical and it caused me to work my butt off freelancing so I could pick up a second one! The CLS system came even further down the road and they introduced more bells and whistles which is what you see today.
With two, I was able to do all sorts of awesome flash photography. I could essentially, take my studio on-location with portability and easy set-up/take-down to get my job done better and faster... Cool.
So, I worked on it and studied lighting more and just kept experimenting. The internet was a huge help along with various DVDs and seminars that I attended. I definitely encourage learning so soak up as much information as you can so you can be all that you can be.
On that note, I hope that these next couple flash articles will help you and get you to use your flash off the camera more.
My workshops and seminars cover all the basics so for this article, I am just going to assume that you at least know the fundamentals, camera settings and lingo that I will use.
First things first, you need to think about what you are going to use as your flash settings. The two obvious choices that I can think of is whether you will want to use the camera and flash's TTL system or if you simply want to use the flash in manual mode. There are pros and cons to using either one so let's go over what they are:
TTL FLASH: (TTL stands for "Thru The Lens" BTW)High speed sync (or FP sync for Canon shooters)... This is some awesome stuff that is worth it's weight in gold! (More that high speed sync stuff later) TTL is also very easy to use. Nikon shooters do have a little more luxury in this department and have the ability to easily tweak their flash output on all slave units from their camera. Canon users don't have such a luxury and have to purchase a ST-E2 and use light ratios to get the same effect. TTL frees us up from the old days where it seemed like every photographer also needed a quantum mechanics degree as well...
Seriously with that? Well the TTL system takes care of that and calculates the proper flash output because it knows all the variables in those equations. The result it that you have your own little math geek in your flash now!
The technology does have its limitations however. For example, you will get flaky and inconsistent results if the ambient light is too bright or when commander unit is not in sight of the slave units and stuff like that. Distance from commander to slave can also be an issue. There are products out there like the RadioPoppers and PocketWizards newest product (The TT1 and TT5) that do fix these limitations. Another issue is that this stuff is proprietary so you can only have Nikon flashes with your Nikon cameras or Canon flashes with your Canon cameras... You can see that this can get expensive at $300+ a pop for their latest flashes.
Check out this video on the Mini TT1 and Flex TT5...
MANUAL MODE: Good ol' fashioned manual mode. A lot of photographers use manual mode and I do too. However, photographers such David Hobby and Zack Arias are 110% manual mode flash... Why do that if TTL is as awesome as I say it is??? Well first off, price... The only real big purchase you would make is for at least a pair of PocketWizard's or more if you want to use more flashes. There are things known as "eBay triggers" out there which may not be the industry standard, but are 50 times cheaper than a pair of $400 PWs. Not bad! You could even get away with a long PC Sync cable and run it from your camera to your flash tethered to save some cash... Also, you aren't limited to your specific camera brand's flashes. You can pick up ANY flash that has a PC Sync input and hook it up to your wireless transmitter and you are good to go! If the flash doesn't have a PC Sync input then you can always buy a hot shoe mount that has one and daisy chain it that way to work. (PC sync cable to hot shoe mount then flash mounted on hot shoe)
So you can get away with dropping a lot less for a manual flash setup... Why else does it rock? Well, TTL does all that fancy pants trigonometry stuff to do all the busy work for you with each and every shot. That means the flash output will be or can be different with each shot or composition change that you make. This could be an issue and give you inconsistent results from one to another... It's sort of the Matrix metering system but for flashes you know? Therefore you have to ride the flash exposure compensation.
Here are a couple example images that were shot with Manual Flash:
We were in a tight space in this alley and I couldn't rely on my lighting system to work in TTL mode. Also, it was dark enough where I didn't need a fast shutter speed to dial down the ambient light so I hooked up my PocketWizard Plus II receivers and shot in manual mode. All I needed to do was set my flashes up once and I could spend more time shooting and less time fidgeting with my settings.
With manual flash however, you set it and forget it... Position subject at X put light stand and flash about arms length away from them at Y, dial in your settings and every shot will have the same flash output... DONE! Unfortunately, there are bad things about this setup. The most annoying issue is your camera's stupid sync speed. The way SLRs work is that the mirror flaps up and the shutter opens for x seconds and closes and then the mirror flaps down... Many cameras have a standard sync speed of 1/200", 1/250" or even a 1/500" (like on the Nikon D70s) but check your camera manual to see what yours is... It is the maximum shutter speed that you can use when shooting with a flash. Plain and simple. If you shoot at that shutter speed or slower then you are all set... Shoot faster than the sync speed and welcome to 'blacklinesinmyphotosville'. What that nice long line is at the bottom of your picture (or left or right side if shooting portrait) is that your exposure was so fast that it didn't give the image enough time to get the full effect of the flash because it closed up too quick.
All in all, as mentioned before, I use both methods. There is a time and place for both of them. I use TTL and high speed sync when I want to shoot portraits and want overpower the sun... That means I can dial down the ambient light and get really cool portraits that are just top notch... If I were to do that in manual mode then I would need a lot more flash power (enter studio strobes and power packs which cost $$$$) to get my shutter speed slow enough so that it falls into the sync speed of the camera....
So that gives you the rundown on what your options are as far as flash modes are concerned. The next part will discuss how to go about quickly set your gear up and dialing in your settings so you can spend more time shooting and less time fidgeting with your it all. Not a bad deal right?
*Sample images coming soon
Be sure to comment on this post and let me know how you use your flash. I know there is a lot more information on the subject. This is meant to be a nice general overview of things to get people started.
Thanks for stopping by!
Mike
4.24.2009
Backup Your Images
Nothing is more important than backing up your data. Unfortunately, this is something that gets pushed to the wayside so we can get a new camera or lens gets. What good is all that camera equipment if we lose all the images taken with it???
It all boils down to storage... Here are some helpful suggestions on how you can preserve your images for years to come:
1.) Do not format your memory cards until you have backed them up. It is important to have yourself "at least" two copies before formatting your memory card!
2.) Invest in quality not quantity. It is easy to see a hard drive for $80 and want to pick it up. However, be sure to do your research and make sure that these hard drives are reliable. We wouldn't want to get into a car that wasn't reliable and take it for a drive across country now would we? Same goes for your hard drives.
3.) Go for speed. Look for hard drives in the 7200rpm or faster range. Also ensure that your external hard drives have various input jack options. These 250 gb rugged external hard drives by LaCie are portable and can withstand a good beating. Trust me, I have tried and they are still kicking!

4.) Things are always better in pairs! Do your research on data redundancy and set yourself up a nice RAID system. The basic nuts and bolts of RAID is that you can have your hard drive mirrored meaning that one could crap out and you will have an exact replica to takes its place. Furthermore, you can put a new hard drive in the old one's place and have the RAID mirroring kick right back in. LaCie also makes amazing products for redundancy. This particular model is the LaCie 5 Big Network NAS file server and it can expand to offer you up to 7.5 Terabytes of data!!!
Front:

Back:

5.) Upgrade your CDs and DVDs from the Walmart brand to archival grade. The cheap DVDs have an average shelf life of like 5 years. Go with the more expensive, but more reliable, archival disks. These last well over 90 years and are more scratch resistant.
6.) Keep a backup off-site. Take one of your hard drives or keep a running record of DVDs and send them over to your mother-in-laws house. Just keep them somewhere safe and away from where you keep your other hard drives. This goes with the saying about having all your eggs in one basket. Heaven forbid you had a fire or a natural disaster hit your house... Having an off site backup ensures that you have one copy somewhere else that is hopefully going to be out of harms way.
One can get pretty overboard with backups so be sure to do your research and follow a backup regiment that will suit your needs and fit in with your already existing workflow.
Thanks for stopping by!
Mike
It all boils down to storage... Here are some helpful suggestions on how you can preserve your images for years to come:
1.) Do not format your memory cards until you have backed them up. It is important to have yourself "at least" two copies before formatting your memory card!
2.) Invest in quality not quantity. It is easy to see a hard drive for $80 and want to pick it up. However, be sure to do your research and make sure that these hard drives are reliable. We wouldn't want to get into a car that wasn't reliable and take it for a drive across country now would we? Same goes for your hard drives.
3.) Go for speed. Look for hard drives in the 7200rpm or faster range. Also ensure that your external hard drives have various input jack options. These 250 gb rugged external hard drives by LaCie are portable and can withstand a good beating. Trust me, I have tried and they are still kicking!
4.) Things are always better in pairs! Do your research on data redundancy and set yourself up a nice RAID system. The basic nuts and bolts of RAID is that you can have your hard drive mirrored meaning that one could crap out and you will have an exact replica to takes its place. Furthermore, you can put a new hard drive in the old one's place and have the RAID mirroring kick right back in. LaCie also makes amazing products for redundancy. This particular model is the LaCie 5 Big Network NAS file server and it can expand to offer you up to 7.5 Terabytes of data!!!
Front:
Back:
5.) Upgrade your CDs and DVDs from the Walmart brand to archival grade. The cheap DVDs have an average shelf life of like 5 years. Go with the more expensive, but more reliable, archival disks. These last well over 90 years and are more scratch resistant.
6.) Keep a backup off-site. Take one of your hard drives or keep a running record of DVDs and send them over to your mother-in-laws house. Just keep them somewhere safe and away from where you keep your other hard drives. This goes with the saying about having all your eggs in one basket. Heaven forbid you had a fire or a natural disaster hit your house... Having an off site backup ensures that you have one copy somewhere else that is hopefully going to be out of harms way.
One can get pretty overboard with backups so be sure to do your research and follow a backup regiment that will suit your needs and fit in with your already existing workflow.
Thanks for stopping by!
Mike
4.23.2009
To Pose Or Not To Pose...
To pose, or not to pose: That is the question. A question all modern day wedding photographers have to face. Today’s bride is all about “photo journalism.” It’s getting to the point where they turn their head anytime someone mentions the word “pose”. However, do they really know what this term means or did they just see that buzz word in a bridal magazine?

Photojournalism, documentary, and lifestyle photography are all synonyms. They all mean that the photographer will be unobtrusive and capture those special, candid moments as they unfold. But what does a photographer do when these special moments are few and far in-between? What do you do when the story unfolding in front of you is the bride’s father not approving of his future son-in-law, or when the groom is having second thoughts or when the couple is getting married for all the wrong reasons? This may seem far-fetched but I can guarantee that it’s happened before.

A true “photo journalistic” photographer should be capturing these fights and lack of love in each other’s eyes the same way true photo journalists do when in the heart of war zones. However, do you think the bride will be happy to see these moments in her wedding album? Me either. So what do we do as photo journalistic wedding photographers? We’re damned if we do and we’re damned if we don’t.

If we don’t hang that shingle out there saying we shoot in a photo journalistic style then we won’t get many bookings. Brides want what the magazines tell them because posed photos are old fashioned and dated. However, if they see their true wedding then they may not like what they see. No one wants a wedding album with a spread of the groom sweating bullets and getting ready to flee to Mexico minutes before the ceremony or the couple just going through the movements without any love in either of their eyes.
My solution is to create a happy medium between the two.

First, I think it is absolutely essential to educate the couple when you meet with them. All of this can be very new to them and most of their information comes from recently married friends of theirs or from magazines. I’ve seen brides asking for photo journalism one minute, yet taking out their plan book and showing me a handful of images that are nothing of the sort. The photos she takes out have been posed shots brides on gondolas in Venice or on a secluded beach in Hawaii. Yes they look amazing but they were most likely taken by a fashion photographer and are very farfetched from the norm. This just goes to show you how no matter what, every bride wants to look like a princess and they want their day to be like it was out of a fairy tale. Educating the bride will let them know how weddings typically run and to let them know that powerful images like the one’s she is showing require a large amount of pre-planning. It probably isn’t in their budget to fly everyone down to Venice or Hawaii but amazing photos can be taken really quite anywhere. It just takes a lot of grunt work, scouting and planning to find a place that is elegant and unique.
Secondly, I tell them how I photograph a wedding. This is where I mention how I “coach” the couples to create these memorable photos. I tell the couple how I offer them tips and pointers throughout the day to make the best images possible. This could mean telling them to sit by a tree together and just talk and be cuddly or even to just tell them to keep doing what they are doing, just a couple steps over so they can be in better light.
Lastly, I strongly recommend that they book my engagement portrait session. Here, I explain that it is a learning experience for both of us. I am seeing what works and what doesn’t and I get to know the best ways to photograph the two of them. On the same token, they get a chance to warm up in front of the camera and to get comfortable with it so that it will all be second nature on their big day.

When it comes to the shoot, I do exactly the things I mentioned to them and really try to keep them engaged and involved in the whole process. I treat things more like an experience than anything. I want them to feel just like they left an amusement park when I am done with them.
This coaching technique can lead one to “machine gun shooting” if you aren’t careful. Over time however, you begin to hone in on your technique and you begin to anticipate the moment that is essentially just how a photojournalist would… The only difference is that our photos will be taken in better light.
Thanks for stopping by,
Mike
Photojournalism, documentary, and lifestyle photography are all synonyms. They all mean that the photographer will be unobtrusive and capture those special, candid moments as they unfold. But what does a photographer do when these special moments are few and far in-between? What do you do when the story unfolding in front of you is the bride’s father not approving of his future son-in-law, or when the groom is having second thoughts or when the couple is getting married for all the wrong reasons? This may seem far-fetched but I can guarantee that it’s happened before.
A true “photo journalistic” photographer should be capturing these fights and lack of love in each other’s eyes the same way true photo journalists do when in the heart of war zones. However, do you think the bride will be happy to see these moments in her wedding album? Me either. So what do we do as photo journalistic wedding photographers? We’re damned if we do and we’re damned if we don’t.
If we don’t hang that shingle out there saying we shoot in a photo journalistic style then we won’t get many bookings. Brides want what the magazines tell them because posed photos are old fashioned and dated. However, if they see their true wedding then they may not like what they see. No one wants a wedding album with a spread of the groom sweating bullets and getting ready to flee to Mexico minutes before the ceremony or the couple just going through the movements without any love in either of their eyes.
My solution is to create a happy medium between the two.
First, I think it is absolutely essential to educate the couple when you meet with them. All of this can be very new to them and most of their information comes from recently married friends of theirs or from magazines. I’ve seen brides asking for photo journalism one minute, yet taking out their plan book and showing me a handful of images that are nothing of the sort. The photos she takes out have been posed shots brides on gondolas in Venice or on a secluded beach in Hawaii. Yes they look amazing but they were most likely taken by a fashion photographer and are very farfetched from the norm. This just goes to show you how no matter what, every bride wants to look like a princess and they want their day to be like it was out of a fairy tale. Educating the bride will let them know how weddings typically run and to let them know that powerful images like the one’s she is showing require a large amount of pre-planning. It probably isn’t in their budget to fly everyone down to Venice or Hawaii but amazing photos can be taken really quite anywhere. It just takes a lot of grunt work, scouting and planning to find a place that is elegant and unique.
Secondly, I tell them how I photograph a wedding. This is where I mention how I “coach” the couples to create these memorable photos. I tell the couple how I offer them tips and pointers throughout the day to make the best images possible. This could mean telling them to sit by a tree together and just talk and be cuddly or even to just tell them to keep doing what they are doing, just a couple steps over so they can be in better light.
Lastly, I strongly recommend that they book my engagement portrait session. Here, I explain that it is a learning experience for both of us. I am seeing what works and what doesn’t and I get to know the best ways to photograph the two of them. On the same token, they get a chance to warm up in front of the camera and to get comfortable with it so that it will all be second nature on their big day.
When it comes to the shoot, I do exactly the things I mentioned to them and really try to keep them engaged and involved in the whole process. I treat things more like an experience than anything. I want them to feel just like they left an amusement park when I am done with them.
This coaching technique can lead one to “machine gun shooting” if you aren’t careful. Over time however, you begin to hone in on your technique and you begin to anticipate the moment that is essentially just how a photojournalist would… The only difference is that our photos will be taken in better light.
Thanks for stopping by,
Mike
4.21.2009
inLIGHTin Workshop @ IPrintFromHome.com HQ
I wanted to go over my recent inLIGHTin Workshop for today's Friday Night Lights segment.
I gave an inLIGHTin Workshop to about a dozen photographers over at the iPrintFromHome.com Headquarters over on Niagara Falls Blvd. For those local to Buffalo... did you know that we have an awesome photo lab right in our backyard?
So we started at 6pm and went a little over three hours! This workshop was all about lighting. We talked about everything from free and available light, to continuous light, speedlights (on and off camera) and ended up on studio strobes... There was A LOT of content and could have easily spent an entire day talking about things...
I had a great time and wanted to thank everyone for attending. I hope to see you at other workshops of mine and as always, call or email whenever if you have any questions guys!
Here are some pics from the workshop that my assistant, Martha, shot during the workshop:


Thanks to the George and Sarah over at the iPrintFromHome.com family for letting us use their space.
4.18.2009
Nikon AF-S 70-200mm f/2.8 VR Review
What better time to review the Nikon AF-S 70-200mm f/2.8 VR when a new one has been announced right?
Basically, I just wanted to let you know that this lens is still going to be used by myself and I do not have immediate plans to upgrade to the new 70-200mm with VRII...

1.) Price! I paid around $1,800 last year from my 70-200mm while the new one appears that it will be going for around $2,400.
2.)VR vs. VR II: You basically get an extra stop of light with this newer version VR. The old one states that you can handhold the lens and get an additional three stops out of it while the new one is rated for four stops.
3.) Lens Coating & Design: The new VRII lens has the nano-crystal coating and sports a new design to boot.
4.) Minimum focusing distance has been dropped from 5 feet to 4.5 feet or so.
5.) The VRII lens is about a quarter inch shorter than its predecessor. However, it is approx. 2.5 oz. heavier.
6.) Sharpness: The new VRII is supposed to have better edge to edge sharpness on the new VRII lens.
7.) AF: Faster focusing with the A/M, M/A and M options.
So if you think that the extra $600 will help out your photography then put an order in for one of the new VRII versions... Otherwise, wait it out and continue to rock it's predecessor.
I personally love my current lens. The important things are that it is fast to acquire focus, it is sharp (even at f/2.8) and it is comfortable in the hands. Need I say more? This lens has some amazing bokeh (that is the term given to the aesthetic quality of the blurred out background in your image when using a shallow depth of field)
I chose to do this review actually because I have been using this lens for more and more of my work as the days go on. My full frame D700 rocks with this lens. I did find that DX crop cameras give me a little too much zoom (approx. 105-300mm focal lengths after considering the crop factor) for my wedding and portrait needs. This lens coupled with a 2x teleconverter on my D300 DX camera gives me an effective 600mm f/5.6 (you lose a stop of light with each x in the teleconverter so my f/2.8 bumps up to f/5.6) Not too shabby! So all in all, I can use this lens with either a DX or FX body and for various photography assignments.
The image quality of this lens really excels when shooting wide open. Here are some sample pics from a job that I just did where the 70-200mm was used at f/2.8:


This lens is a staple for Nikon shooters. There are a couple other "necessary" lenses in Nikon's lineup that you should have with you. The 24-70mm f/2.8, 50mm f/1.4 would have to be the other two that I can come up with. Enjoy and check back tomorrow for some awesome workflow techniques!
Thanks for stopping by.
Mike
Basically, I just wanted to let you know that this lens is still going to be used by myself and I do not have immediate plans to upgrade to the new 70-200mm with VRII...
1.) Price! I paid around $1,800 last year from my 70-200mm while the new one appears that it will be going for around $2,400.
2.)VR vs. VR II: You basically get an extra stop of light with this newer version VR. The old one states that you can handhold the lens and get an additional three stops out of it while the new one is rated for four stops.
3.) Lens Coating & Design: The new VRII lens has the nano-crystal coating and sports a new design to boot.
4.) Minimum focusing distance has been dropped from 5 feet to 4.5 feet or so.
5.) The VRII lens is about a quarter inch shorter than its predecessor. However, it is approx. 2.5 oz. heavier.
6.) Sharpness: The new VRII is supposed to have better edge to edge sharpness on the new VRII lens.
7.) AF: Faster focusing with the A/M, M/A and M options.
So if you think that the extra $600 will help out your photography then put an order in for one of the new VRII versions... Otherwise, wait it out and continue to rock it's predecessor.
I personally love my current lens. The important things are that it is fast to acquire focus, it is sharp (even at f/2.8) and it is comfortable in the hands. Need I say more? This lens has some amazing bokeh (that is the term given to the aesthetic quality of the blurred out background in your image when using a shallow depth of field)
I chose to do this review actually because I have been using this lens for more and more of my work as the days go on. My full frame D700 rocks with this lens. I did find that DX crop cameras give me a little too much zoom (approx. 105-300mm focal lengths after considering the crop factor) for my wedding and portrait needs. This lens coupled with a 2x teleconverter on my D300 DX camera gives me an effective 600mm f/5.6 (you lose a stop of light with each x in the teleconverter so my f/2.8 bumps up to f/5.6) Not too shabby! So all in all, I can use this lens with either a DX or FX body and for various photography assignments.
The image quality of this lens really excels when shooting wide open. Here are some sample pics from a job that I just did where the 70-200mm was used at f/2.8:
This lens is a staple for Nikon shooters. There are a couple other "necessary" lenses in Nikon's lineup that you should have with you. The 24-70mm f/2.8, 50mm f/1.4 would have to be the other two that I can come up with. Enjoy and check back tomorrow for some awesome workflow techniques!
Thanks for stopping by.
Mike
4.14.2009
Top 10 Tips for Better Landscape Photography
Top 10 Tips for Better Landscape Photos:
1.) Use a tripod. I think that one is self-explanatory. Tripods stabilize your camera and ensure that your shots will be sharp. A lot of photography techniques, such as blurring waterfalls, requires a steady camera and a long shutter speed so we need that camera to be steady. I also should point out that you should look into also using a remote shutter release to also prevent any unnecessary camera movement. If you wanted the benefit of this on the cheap or if you forgot to bring your shutter release with you then you could always use the timer feature of your camera. Set it to 2 or 5 second delay and that will ensure that the camera isn't affected by you pressing the shutter.

Using a tripod allowed me to take this 16.5 minute star trail in Joshua Tree National Park. Good luck hand holding your camera that long!
2.)Use Mirror Up Mode. I am not sure if every camera has this feature but it further prevents any camera movement at time of capture. With this setting enabled, you press the shutter once to snap the mirror up and then the second photo simply takes the exposure without any internal mirror snapping. Anything to reduce movement on the camera.
3.) Do your Research. If you are planning a trip somewhere or are ready to go out and shoot then be sure that you know when the sunup/sunset times are, what the weather is like (and dress appropriately) and where the best setup locations will be. "Chance favors the prepared mind" so the more prepared you are going into the shoot, the better your images will be. A GPS is also your friend and is a great tool for landscape photographers.
4.) Invest in Filters. Certain filters are essential to taking amazing images in camera. Sure we could take multiple shots and HDR them but I am talking about technique here. Many have the "I'll fix it in Photoshop" approach to photography which I am trying to break one person at a time here. If you are just starting out then HDR your heart out until you can save up for decent filters. Call me old fashioned but I want to see an amazing image on the back of my camera in order for me to feel good about an image. Many times, this requires the use of filters. I would recommend circular polarizer filters (reduce glare and gives images more of a color pop in-camera.), ND filters (Come in various levels of intensity. These darken the overall exposure and allow you to shoot at slower shutter speeds), graduated ND filters (these are gradients that go from dark to clear. Their purpose is to darken the sky and even out the overall exposure of a landscape) and filter holders (such as the Cokin Z-Pro).
5.) Be Unique. There is only so many ways someone can take a photograph. If you are visiting a popular location frequented by photographers year round then chances are you will be taking a photo that looks just like theirs. Be unique and come up with different ideas. Maybe shoot details around the area, use tighter crops, try panoramas or use obscure things in the foreground. Just be different.
6.) The Early Bird Gets the Worm. Be willing to venture out early enough to catch sunsets. This means waking up well ahead of time, getting a good breakfast and get out to your location wit your camera ready to go just before sunset. Remember "chance favors the prepared mind." If you are a late riser then there is always sunsets to look forward to. The reason for this is that the sun isn't at an extreme such as high noon and the light is essentially fanning across the landscape. The colors in the sky are also the most impressive during these times.
7.) Composition is Key. Remember the basics such as the Rule of Thirds, the Golden Ratio, triangles, figure eights, leading lines and other compositional rules. Always strive for a foreground, mid and background to give a sense of depth and dimension. If you want to portray size then try to always have something in the photograph to serve as a reference. This could be a person hiking while you capture a majestic mountain. As always, rules are meant to be broken so if it looks good to you then chances are you have yourself a winner. "There are no rules for good photographs, there are only good photographs." - Ansel Adams

8.) Bracket Your Shots. I've had it happen to me where you get so caught up in the moment or things are a rush so you may forget to check your settings or your exposures on the back of your camera. By bracketing your shots, you can ensure that you will at least have a couple usable images from the set. On that note, always run through your camera settings to ensure they are set to what you want. For landscapes, I recommend using the largest RAW file in Adobe RGB. This will give you larger files but they will have more data and contain the most color. Film was expensive but memory card real estate is cheap so use up those memory cards. It only will cost you more time behind the computer when going through them all.
9.) Travel. Life is short. Go out and see the world. Unless Yosemite or Yellowstone is in your backyard then chances are you will have to travel some to get great images. Sure you can look for some gems in your backyard and search for local getaways but the real magic comes when you do a little traveling. I know I get burned out living in the same spot with the same things to photograph... Traveling to a new location is an eye opener and serves as a much needed revitalization. I find a whole new level of inspiration when in a new state or county. Take the wife and kids or go on a photo safari by yourself. Exotic animals and unique landscapes will not be ringing your doorbell so you have to go out and search for them. Just be safe and take a guide with you if you are unsure of your surroundings or what you will be getting into.

Not everyone has one of these in their backyard! Photo taken in Chichen-Itza, Mexico.
10) Get To Know the Area. Camp out and become a part of what you are photographing. The moods and feeling you get should be the fuel for your photographs. When you understand what you are photographing then you will be able to truly capture it's essence.

This photo tells a story to me. I shot this image after proposing to my wife in Allegheny State Park. Don't tell me that it didn't have an effect on my feelings. I find this image to be very calming, mysterious and pleasing to the eyes. I could go on for hours about this one since I think it is my favorite image to date.
Ansel Adams said the following quotes that should really hit home:
"A great photograph is one that fully expresses what one feels, in the deepest sense, about what is being photographed. "
“Simply look with perceptive eyes at the world about you, and trust to your own reactions and convictions. Ask yourself: "Does this subject move me to feel, think and dream? Can I visualize a print - my own personal statement of what I feel and want to convey - from the subject before me?”
“You don't take a photograph, you make it.”
I hope this helps in your quest for better photographs.
Enjoy!
Mike
1.) Use a tripod. I think that one is self-explanatory. Tripods stabilize your camera and ensure that your shots will be sharp. A lot of photography techniques, such as blurring waterfalls, requires a steady camera and a long shutter speed so we need that camera to be steady. I also should point out that you should look into also using a remote shutter release to also prevent any unnecessary camera movement. If you wanted the benefit of this on the cheap or if you forgot to bring your shutter release with you then you could always use the timer feature of your camera. Set it to 2 or 5 second delay and that will ensure that the camera isn't affected by you pressing the shutter.
Using a tripod allowed me to take this 16.5 minute star trail in Joshua Tree National Park. Good luck hand holding your camera that long!
2.)Use Mirror Up Mode. I am not sure if every camera has this feature but it further prevents any camera movement at time of capture. With this setting enabled, you press the shutter once to snap the mirror up and then the second photo simply takes the exposure without any internal mirror snapping. Anything to reduce movement on the camera.
3.) Do your Research. If you are planning a trip somewhere or are ready to go out and shoot then be sure that you know when the sunup/sunset times are, what the weather is like (and dress appropriately) and where the best setup locations will be. "Chance favors the prepared mind" so the more prepared you are going into the shoot, the better your images will be. A GPS is also your friend and is a great tool for landscape photographers.
4.) Invest in Filters. Certain filters are essential to taking amazing images in camera. Sure we could take multiple shots and HDR them but I am talking about technique here. Many have the "I'll fix it in Photoshop" approach to photography which I am trying to break one person at a time here. If you are just starting out then HDR your heart out until you can save up for decent filters. Call me old fashioned but I want to see an amazing image on the back of my camera in order for me to feel good about an image. Many times, this requires the use of filters. I would recommend circular polarizer filters (reduce glare and gives images more of a color pop in-camera.), ND filters (Come in various levels of intensity. These darken the overall exposure and allow you to shoot at slower shutter speeds), graduated ND filters (these are gradients that go from dark to clear. Their purpose is to darken the sky and even out the overall exposure of a landscape) and filter holders (such as the Cokin Z-Pro).
5.) Be Unique. There is only so many ways someone can take a photograph. If you are visiting a popular location frequented by photographers year round then chances are you will be taking a photo that looks just like theirs. Be unique and come up with different ideas. Maybe shoot details around the area, use tighter crops, try panoramas or use obscure things in the foreground. Just be different.
6.) The Early Bird Gets the Worm. Be willing to venture out early enough to catch sunsets. This means waking up well ahead of time, getting a good breakfast and get out to your location wit your camera ready to go just before sunset. Remember "chance favors the prepared mind." If you are a late riser then there is always sunsets to look forward to. The reason for this is that the sun isn't at an extreme such as high noon and the light is essentially fanning across the landscape. The colors in the sky are also the most impressive during these times.
7.) Composition is Key. Remember the basics such as the Rule of Thirds, the Golden Ratio, triangles, figure eights, leading lines and other compositional rules. Always strive for a foreground, mid and background to give a sense of depth and dimension. If you want to portray size then try to always have something in the photograph to serve as a reference. This could be a person hiking while you capture a majestic mountain. As always, rules are meant to be broken so if it looks good to you then chances are you have yourself a winner. "There are no rules for good photographs, there are only good photographs." - Ansel Adams
8.) Bracket Your Shots. I've had it happen to me where you get so caught up in the moment or things are a rush so you may forget to check your settings or your exposures on the back of your camera. By bracketing your shots, you can ensure that you will at least have a couple usable images from the set. On that note, always run through your camera settings to ensure they are set to what you want. For landscapes, I recommend using the largest RAW file in Adobe RGB. This will give you larger files but they will have more data and contain the most color. Film was expensive but memory card real estate is cheap so use up those memory cards. It only will cost you more time behind the computer when going through them all.
9.) Travel. Life is short. Go out and see the world. Unless Yosemite or Yellowstone is in your backyard then chances are you will have to travel some to get great images. Sure you can look for some gems in your backyard and search for local getaways but the real magic comes when you do a little traveling. I know I get burned out living in the same spot with the same things to photograph... Traveling to a new location is an eye opener and serves as a much needed revitalization. I find a whole new level of inspiration when in a new state or county. Take the wife and kids or go on a photo safari by yourself. Exotic animals and unique landscapes will not be ringing your doorbell so you have to go out and search for them. Just be safe and take a guide with you if you are unsure of your surroundings or what you will be getting into.
Not everyone has one of these in their backyard! Photo taken in Chichen-Itza, Mexico.
10) Get To Know the Area. Camp out and become a part of what you are photographing. The moods and feeling you get should be the fuel for your photographs. When you understand what you are photographing then you will be able to truly capture it's essence.
This photo tells a story to me. I shot this image after proposing to my wife in Allegheny State Park. Don't tell me that it didn't have an effect on my feelings. I find this image to be very calming, mysterious and pleasing to the eyes. I could go on for hours about this one since I think it is my favorite image to date.
Ansel Adams said the following quotes that should really hit home:
"A great photograph is one that fully expresses what one feels, in the deepest sense, about what is being photographed. "
“Simply look with perceptive eyes at the world about you, and trust to your own reactions and convictions. Ask yourself: "Does this subject move me to feel, think and dream? Can I visualize a print - my own personal statement of what I feel and want to convey - from the subject before me?”
“You don't take a photograph, you make it.”
I hope this helps in your quest for better photographs.
Enjoy!
Mike
4.13.2009
Doing Your Time - Wait And Be Rewarded
I was pretty lucky that the stars aligned fairly well for while in California. I came back with a lot of great images that I obviously couldn't have gotten here in Buffalo. Not too many cacti or mountains around here ;P
I am still going through images from the trip and it inspired me to write this little article here.
So many people focus on camera equipment and computer software but forget that great images simply require you to do your time.
What I mean by this is that the stars essentially have to align with you being there right smack dab in the middle of it all. Sometimes, you being there is fate. There is no easy way to call it anything else. It is just you and the shot right there at the right time. I have seen many powerful images through my various workshops and speaking engagements. These images were taken by self-proclaimed "amateur" photographers. They were at the right place at the right time and snap, they captured it beautifully. However, these powerful images in their portfolio were few and far in-between. It is my goal in this article for you to capture more of those powerful photographs time after time.
I think that Louis Pasteur nailed it best when he said: "Chance favors the prepared mind."
I have been hanging on this quote ever since I heard Ansel Adams say it. He was no slouch when it came to inspiration quotes either. Here are some of my favorites:
"Sometimes I do get to places just when God's ready to have somebody click the shutter"
"A photograph is not an accident- It is a concept."
"The ‘machine-gun’ approach to photography – by which many negatives are made with the hope that one will be good – is fatal to serious results."
"Twelve significant photographs in any one year is a good crop"
All of these quotes hold great value to me. How many times do we find ourselves guilty of "machine gun" shooting? I know I am an offender at times. How many times do we put together our portfolio together with quantity in mind and not quality? A portfolio is only as strong as its weakest print. Remember that.
So back to the topic at hand, doing time. For me, taking the time out to research and study what I am about to photograph. If I will be photographing some place local, I will go to the site and scout out the area. This comes in handy but what if you happen to be at the right place at the right time? You better be on your game to make the shot. Here is an example of just being at the right place at the right time.
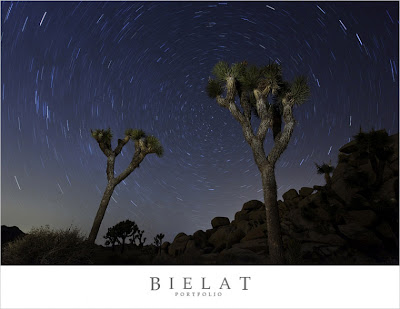
The next shot wouldn't have been anything special if I didn't get up at the crack of dawn. If I waited any longer then the fog would have rolled out and the sky would have lost all that overcast:
This next photograph happened to be me being there at the right moment. My camera gear was out and equipped and I waited patiently until this turtle decided to swim by and make his appearance. My camera settings were right and all I had to do was press the shutter...

It isn't always easy for the amateur photographer to dedicate this much time to their hobby. Sure they have a nice camera but the 9-5 job, family and other factors can easily make it so one cannot always get out to take pictures. This means that the few times they actually can get out to shoot might not be the 'right' day. The light may be horrible, their may be no cloud cover, the seasons may not be right or it could be a slew of other reasons.
So just remember "Chance favors the prepared mind" so just sit down and do your research then you will have much more eventful shoots.
------------------------------------------------------------
If you are an IPhone or IPod Touch user then I would suggest adding the following Applications to help you be ready:
1.) PhotoCalc ($2.99)
2.) Darkness - Sun, Moon, Clock + More ($1.99)
3.) more to be updated as I find them or as they become available...
I am still going through images from the trip and it inspired me to write this little article here.
So many people focus on camera equipment and computer software but forget that great images simply require you to do your time.
What I mean by this is that the stars essentially have to align with you being there right smack dab in the middle of it all. Sometimes, you being there is fate. There is no easy way to call it anything else. It is just you and the shot right there at the right time. I have seen many powerful images through my various workshops and speaking engagements. These images were taken by self-proclaimed "amateur" photographers. They were at the right place at the right time and snap, they captured it beautifully. However, these powerful images in their portfolio were few and far in-between. It is my goal in this article for you to capture more of those powerful photographs time after time.
I think that Louis Pasteur nailed it best when he said: "Chance favors the prepared mind."
I have been hanging on this quote ever since I heard Ansel Adams say it. He was no slouch when it came to inspiration quotes either. Here are some of my favorites:
"Sometimes I do get to places just when God's ready to have somebody click the shutter"
"A photograph is not an accident- It is a concept."
"The ‘machine-gun’ approach to photography – by which many negatives are made with the hope that one will be good – is fatal to serious results."
"Twelve significant photographs in any one year is a good crop"
All of these quotes hold great value to me. How many times do we find ourselves guilty of "machine gun" shooting? I know I am an offender at times. How many times do we put together our portfolio together with quantity in mind and not quality? A portfolio is only as strong as its weakest print. Remember that.
So back to the topic at hand, doing time. For me, taking the time out to research and study what I am about to photograph. If I will be photographing some place local, I will go to the site and scout out the area. This comes in handy but what if you happen to be at the right place at the right time? You better be on your game to make the shot. Here is an example of just being at the right place at the right time.
The next shot wouldn't have been anything special if I didn't get up at the crack of dawn. If I waited any longer then the fog would have rolled out and the sky would have lost all that overcast:
This next photograph happened to be me being there at the right moment. My camera gear was out and equipped and I waited patiently until this turtle decided to swim by and make his appearance. My camera settings were right and all I had to do was press the shutter...
It isn't always easy for the amateur photographer to dedicate this much time to their hobby. Sure they have a nice camera but the 9-5 job, family and other factors can easily make it so one cannot always get out to take pictures. This means that the few times they actually can get out to shoot might not be the 'right' day. The light may be horrible, their may be no cloud cover, the seasons may not be right or it could be a slew of other reasons.
So just remember "Chance favors the prepared mind" so just sit down and do your research then you will have much more eventful shoots.
------------------------------------------------------------
If you are an IPhone or IPod Touch user then I would suggest adding the following Applications to help you be ready:
1.) PhotoCalc ($2.99)
2.) Darkness - Sun, Moon, Clock + More ($1.99)
3.) more to be updated as I find them or as they become available...
3.19.2009
Video With The Nikon D90
I have been goofing around with the Nikon D90 for some time now. I wanted to iron out all the kinks before offering this photo/video fusion to my clients so here is a sample video my wife and I shot just today. As you can see, it is of my little guy, Cameron, and his first time eating solid foods. This is just a quick run of how quick video can be taken and edited down to a decent home movie or more...
I shot this video using a Nikon D90 and a Nikkor 24-70mm f/2.8 lens. A monopod was used to stabilize the camera some and everything else was pretty much pretty basic. The video was shot in the highest high def quality that the D90 offers (720i) and then converted from AVI to MOV format on my Macbook Pro. iMovie '08 was used to edit the video and throw in the titles, transitions and music.
All in all, it took about 1 hour to edit around 40 minutes of video down to the 6.5 minute movie that you see here:
Nikon D90 Home Movie Sample from Michael Bielat on Vimeo
http://www.vimeo.com/3772052
Here are my initial thoughts about the D90...
D90 Pros:
- I love how easy it is to shoot the video and it is all on the SD card for quick transferring over to my computer. My High Def camcorder uses miniDV tapes which is a REAL pain to get the video to my computer. This isn't an issue with video being on an SD card.
- 720p High Def quality is still awesome! Don't tell me "Joe Six Pack" (yeah I'm bringing it back) can tell the difference between 720p and 1080p...
- A couple button clicks and you are recording high def video easily. It took my wife 2 minutes to get her groove on with recording video and applying her artistic eye on things. Don't let her know but it only took me 1 minute ;p
- Quiet: The shutter isn't loud when taking still captures.
D90 Cons:
- Camera shake when shooting video. The camera body is so light that it is easy to wiggle around.VR lenses will help but there aren't too many in Nikon's lens arsenal that are fast enough and worthy for all around use. My only VR lens is the 70-200mm and good luck keeping the camera steady hand holding that bad boy. I am using a monopod to steady the camera but a stabilizer will definitely be my next purchase. I may purchase the battery grip down the road to help weigh this camera down.
- Blur: The only fast and responsive way to focus is manually. The 3" LCD screen helps to judge your focus but it isn't always perfect. I like to use the shallow DOF that my lenses have so I really need to be dead on. I also like to do unique camera angles that have me looking at the LCD screen on quite the extreme angle. I look forward to how they will handle this is future camera models.
- Jello Video: The software design of things makes it so that the video appears to jiggle like jello when panning fast or shaking the camera. This isn't found on camcorders. Hopefully a firmware update can fix this...
- External Mic: No way to add one so we're stuck with the built in one which isn't anything to write home about.
- Bumpy: Video tends to flicker or jump at times. If you don't have some sort of stabilization in place then good luck! Even with stabilization, there still are some skips it seems.
- I miss the D700 feel. The buttons on the D90 are all over the place and it is missing a lot of great features that the D700 has. It is just a pain when switching between the two but hey, it's a $2000 price difference so what do you expect? This is something that I can totally live without to save that much money.
So all in all, if you have no interest in using the video capabilities of your DSLR, whether it be the Nikon D90 or Canon 5D Mark II, at least give it a go and shoot some home movies. Nothing beats capturing video to help tell a story. I played this video back after editing it and got choked up. Would I get that if I had only images? Maybe... maybe not. I do believe that there is a place for both mediums but this really gave me a nice new view of things. My little background in videography helped as well.
Otherwise, you could utilize these capabilities to the max and begin offering video options as a service. Will these videos put videographers and cinematographers out of business? Not yet.
The photos coming out of this camera are really impressive. Nikon didn't take the D300 sensor for use in this camera but they did model the D90's sensor off the D300. So it is similar but different. Can we tell the difference? Probably not. The IQ (image quality) coming out of this camera is very impressive. I shot with it all around California and really got a lot of use out of it when needing that extra zoom. With this camera being in the 1.5x crop factor, I managed to get an effective 600mm zoom when pairing up the camera with a 2x teleconverter and my 70-200mm.
Nice and sharp, even with the teleconverter mounted. I was worried about that since I need some AF fine tuning on my D700 when using the teleconverter.
The files turned out quite nicely at ISO's up to 1600. The D90 doesn't have the extreme ISOs like the D3/D700 cameras but that is something that kept the camera's cost down I am guessing...
So I am extremely happy with this camera. It replaced my camcorder and allows me to get more creative in ways that I couldn't before. I do miss doing my video so this is a breath of fresh air and has me real excited. I find myself taking this camera with me when going out and especially when hanging out with the family for shots of Cameron. It is very small and portable so I can put it into my Lowepro Slingshot 200 bag along with my SB-900, extra batteries and a couple lenses (24-70mm f/2.8 and the 85mm f/1.8) with lots of room to spare!
If you are toying around with getting a point and shoot like a Nikon P6000 then I would recommend to just go the little extra and pick yourself up the D90. It is portable enough in my opinion without getting in the way and your photos will really shine. More than what a point and shoot can do that is for sure!
Thanks!
Mike
3.05.2009
Get Accurate Colors In Camera
I think it is safe to say that RAW workflow is the standard for almost all professional photographers. Even with that, I am sure there are still many pros that choose to shoot JPEG files. There is nothing wrong with either method. If the shoe fits, right? I personally prefer a RAW workflow myself but to each his own right? Applications like Adobe Lightroom further sweeten the deal for me. Programs like this make RAW workflow a breeze. Batch processing allows you to correct one RAW file and process the same settings across multiple images. Presets can be created to recollect your favorite settings and effects even. These various methods all help save you time and allow you to spend more time behind the camera rather than editing photos on your computer. For JPEG shooters, this luxury really can only be done through the use of your in-camera settings or custom actions in Photoshop. And good luck if you need to make some drastic white balance corrections!

Your in-camera white balance setting is a great asset to JEPG and RAW shooter alike. Nailing an accurate white balance in the camera is one of the biggest time savers that I have noticed. The camera’s presets come close to accurate colors but many times they still require additional fine-tuning in order to get the most accurate colors. Auto white balance is fine for a snapshot but the white balance values are all over the place from shot to shot and good luck color correcting those JPEGS! In this article, I plan on going over how to obtain the best color directly in-camera and the tools which work for me.
Color correction was always a nightmare for me. This was my primary reason for shooting RAW for the longest time. My previous gray card targets like the Whibal and so on were 'close' but I always had too much magenta or something that looked just plain off. The RAW file has a lot more leverage when it comes to obtaining the best white balance and exposure correction. Now I don’t know about you but the perfectionist in me always questioned my white balance. I have purchased my share of gray cards and color checkers but even the most expensive one is no use when you forget to take it out of your camera bag!
Well, color correction issues became a figment of my imagination once I discovered the BRNO BaLens. The BaLens replaces your lens cap and comes in a variety of sizes so it is likely to fit any of your lenses. Its design is simple; a white translucent dome, which is about the size of a quarter, sits in the center of the cap and can be swapped out with a warmer portrait dome for warmer skin times if need be. The BaLens comes with a neutral and warm dome. The neutral one is ideal for any situation where the warmer one is most beneficial for skin tones and portraits. I prefer to just keep the neutral one on and simply dial in a little warmth to skin tones in post-production if need be.
It is very easy to switch out the different domes but I could just slide the Kelvin slider a couple hundred degrees and that seems to always to the trick for me. The BaLens did require some more steps to follow. It relies on using your test image to be stored as a white balance preset in the camera while gray cards can be captured and worked with in post-production. The steps require me to take the test shot using program mode, manual focus and auto white balance. I use Program mode only for this purpose simply because it takes care of the exposure for me without me having to fidget with my exposure. My camera is set up so it doesn’t take a picture unless focus is acquired so putting my lens into manual focus bypasses this. Because of the BaLens’ design, they recommend taking the test image using auto white balance. It’s quite straightforward from there. I have the BaLens lens cap on and take a photo of the main light source (or in between the two light sources if there are different casts to acquire an average balance). The last step is for me to use that image as the white balance preset value. Refer to your camera’s user manual for instructions on how to set the white balance preset. It sounds like a hassle but I can pull all this off in half a minute tops. Yeah the first couple tries seemed like I was all thumbs but the more you do it, the faster you get. For weddings or portraits, I just make sure to spark up a conversation or have my second shooter take them for a few images while I go through the white balance settings to make the shoot flow seamlessly.
You’re probably wondering what the results are like. Let’s take a look at the differences between my old means of white balance calibration and the new. If your computer monitor isn't calibrated then don't expect to really see any color accuracy since your monitor's color is probably off in some way. I would recommend picking up a monitor calibration device if that is the case.
So long story short, the BaLens out performs all my other white balance targets. Are there better white balance targets out there? Probably. Are they as easy to use and convenient as the BaLens? Probably not.
I hope this article was useful to you. As always feel free to get in touch with me by commenting below or register with the inLIGHTin Forum and we can chat about all things photography there. Thanks for reading and take care!
You can purchase the BRNO BaLens at the following locations:
www.balens.ca
http://amplis.com
or at any of these other fine retailers:
HERE
Thanks,
Mike
2.10.2009
Kenny Kim Interview
I first met Kenny when attending Mike Colón and Bob Davis' Master Your Craft seminar down in New York City. He was very personable and ridiculously nice. On top of that, he had these amazing shirts for sale that I had to get ;P

After that, I seen Kenny everywhere I looked, every photo blog, every magazine I seen somehow up had Kenny in it! Absolutely amazing.
In a few short years, Kenny has made his way through the ranks and gotten his name out there in the industry like I have never seen before! His drive and determination has made him one of my biggest inspirations to date.
Kenny took some time out of his busy schedule to answer some questions for us.
Thank you Kenny for taking the time out for the interview and also for also being a great friend and huge inspiration!
mike

After that, I seen Kenny everywhere I looked, every photo blog, every magazine I seen somehow up had Kenny in it! Absolutely amazing.
In a few short years, Kenny has made his way through the ranks and gotten his name out there in the industry like I have never seen before! His drive and determination has made him one of my biggest inspirations to date.
Kenny took some time out of his busy schedule to answer some questions for us.
 | What’s one word that describes yourself? Kenny Kim: Personable What’s your businesses primary area of photography? KK: Lifestyle Wedding Photography When did you start Kenny Kim Photography? KK: This is my 3rd year going in full-time. 2006. | |
| > What first sparked your interest in photography? KK: Shooting for collegiate sports helped me learn the techniques. I’ve been fascinated with people since I was little. I have shoe boxes full of bad photos. What made you decide to pursue a career in photography? KK: Earlier in my career, a mother of the bride came up to me, gave me a hug, and told me that I was their family’s best photographer. She said that but didn’t see a single image I shot. That’s when I knew I could make it in this business. How would you best describe yourself and your photographic style? KK: I’m fun, engaging and personable. I approach each wedding as if it was my own family’s wedding. I look for candid and natural moments. What do you feel separates yourself from other photographers in your same profession? KK: I make an effort to build relationships with all my clients. Better I get to know them, better results I get. What other photographer or photographers have been a big inspiration to you? KK: I have so many wonderful colleagues that I need to thank. Particularly - Mike Colón, David Jay, Bob Davis, Becker – They helped me to get jump start in my career in the beginning. There are many others that I love to name but the list will go on and on. What else motivates and inspires you? KK: I get energized by people and the dynamics that each couple brings. What does a typical day of yours involve? KK: Weekdays are typical. I travel a lot, but when I am at home, I get up (slowly), get some coffee and usually start out browsing the web, catch up on my email and do some editing. I try to meet with people during the day but if not, then I’m doing various things related to my business. How often do you travel for assignments? KK: I think I spent more time on the road last year then I did at home. Eek! Do you have anyone else working for you? Do you outsource your work? If so then what do you primarily outsource? KK: I outsource all my album work. I have two wonderful designers working for me. I have a degree in graphic design but I learned a lesson that just because I can do it doesn’t mean I have to do it. So I also outsource all my graphic design materials to my good friend who is also an excellent designer. As for second shooters, I get lot of inquires of people interested in second shooting with me so I usually utilize them to come help me out at weddings. I make sure they have fun and capture great images! What was the coolest assignment/location that you have ever shot and why? KK: I love destination weddings. Having said that, my answer to the question would be the “next wedding” I shoot will be my coolest one. I really want to have that mentality and approach to each client I shoot for so that they will get the best of my work. What is your absolute favorite photo that you have ever taken and why? 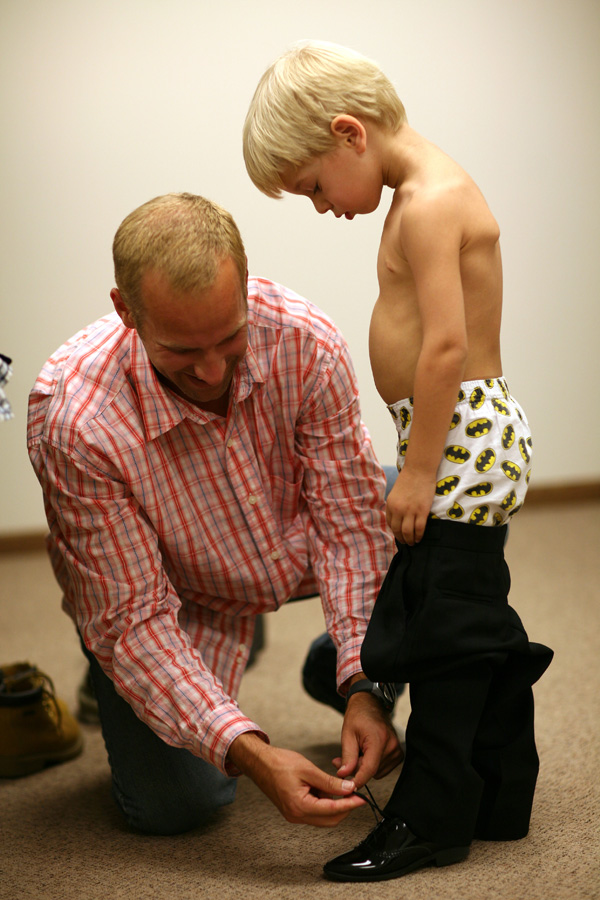 KK: I hate those “favorite questions” but this one I took back in 2006 still brings a smile to my face. I was with the groomsmen taking some shots of them getting ready. The ring bearer was one of the groomsmen’s sons. He needed some help with tying his shoes. His father saw he was having hard time, laughed and bent down to tie the laces for him. I love the relationship between them and the ring bearer’s boxers. It was a genuine moment that I was fortunate to capture. What advice can you offer other pros out there to take their business to the next level? KK: #1 - Make your business about serving your clients. Have fun. #2 Don’t ever forget rule #1. When did you start doing conferences, workshops and/or speaking engagements? KK: I have not done any workshops or conferences of my own. I’ve mainly just helped other photographers with their own workshops. (Mike Colón, David Jay, Bob Davis, Jeff & Julia Woods). I’ve been learning a lot from them and look forward to having one of my in the future. Not sure when that will be but once I learn how to fish well, then I’ll know when it’s time to teach others how to fish. Where can we see you speaking next? KK: I will be at WPPI in Vegas. You can find me speaking at the Pictage booth on Feb 17th from 12pm to 1pm. If you do not care to hear me speak, then come hear Robert Evans who will be with me. He’s pretty famous! Where can we see some more of your work? KK: www.KennyKim.com is my web site. You can also find me on Facebook and check out some of my work there! What advice can you offer in regards to being published, appearing in advertisements and getting sponsorships? KK: Build relationships with your vendors and editors! What camera equipment are you currently shooting with? KK: Canon Mark 1D III & 5D. What’s your lens of choice? KK: Canon 24-70mm f/2.8L What item can’t you leave the house without? KK: My iPhone What equipment can’t you wait for to come out and why? KK: Canon 14-300mm f/1.2L! If they ever come out with it, I’ll sell all my other lenses! Are you sponsored by any companies? KK: Boda Bag, GoBee Bags, and few others which I can’t mention right now. Do you have any plugs that you would like to make? KK: Please help support Thirst Relief International (www.thirstrelief.org). It's a great charity you can help support them by visiting THIS SITE. I donate 10% of all sales to the Thirst Relief International. | ||
Thank you Kenny for taking the time out for the interview and also for also being a great friend and huge inspiration!
mike
Subscribe to:
Posts (Atom)