10.22.2010

Advanced Lighting with Speedlights

Want to start "making" photos instead of simply "taking" photos? One of the best ways to start is to incorporate some advanced lighting techniques with your flash (or flashes).

Shooting with available lighting is great and all and can really do the trick. As a matter of fact I made a career out of it for a couple years until I could afford some flashes myself.

STEP 1 - BABY STEPS:
You have to crawl before you can walk and definitely before you can run... The same goes for flash photography. It is a whole new ballgame that can really mess with your current understanding of ISO, Aperture and Shutter Speed and how they work with one another. With that in mind, start off with your flash mounted on your camera. Practice fill flash techniques and practice bounce flash techniques. The good news is that you should be able to start shooting in darker locations with better results. This is true even if you have inexpensive variable aperture "kit" lenses. Simply play around with TTL mode and work on riding your flashes' exposure compensation. Not enough flash? Increase the exposure compensation. Too much flash? Dial it down and try again. I would definitely suggest using manual mode for setting your ISO, Aperture and Shutter Speed... Using Aperture Priority, Shutter Priority or Program Mode will introduce other factors that can complicate things.

STEP 2 - HIGH SPEED SYNC (AKA Auto FP)
High speed sync is something that you may have to enable on your camera and/or flash unit. Refer to your manual on how to do this. Once enabled, you will notice that you can use shutter speeds faster than 1/200" or 1/250." This is high speed sync and it removes the limitations of having to otherwise being forced to use your camera's maximum sync speed or slower (refer to your manual for this value -- it's typically 1/200" or 1/250"). High speed sync is a life saver and is what allows you to dial down intense ambient light (like the sun) and also to be able to use wide open apertures. If you didn't have this capability then you would have to bring along a studio strobe, portable AC Power Pack and triggering device so you can shoot at like ISO 100, 1/250" at F/16. High speed sync is a lot cheaper and a lot more portable!

STEP 3 - OFF-CAMERA FLASH (MANUAL MODE)
Using your flash off-camera is a great way to learn lighting. In TTL mode, the camera does it all for you and the flash output will change from shot to shot. By switching your flash to manual mode, you are essentially treating it like a studio strobe and your flash will now only fire at the output you selected. This means your light will be consistent from shot to shot to shot. This setting is great for when things are not going to move (e.g. studio, portraits, etc...) Good luck if you are shooting sports (or a little kid on the move) this way. This is also where you can try incorporating a second (or third flash). The best part here is that you do not need the top of the line flashes, or even flashes from the same brand for that matter! You can get 3-4 cheap flashes for the price of one new model, brand name flash.
Just look for flashes that can shoot in manual mode. Bonus points if it also has a PC Sync port. Otherwise, you will have to purchase some additional items like special hot shoe mounts that have a pc sync port.


creative lighting with speedlights


You could still fire the flashes using the Nikon wireless but your flashes have to be in direct line of sight with one another in order for it to work. Consider using a PC sync cable, IR triggers or Radio triggers for added reliability.

STEP 4 - HIGH SPEED SYNC OFF-CAMERA
Take all the techniques mentioned above and roll them into one! Incorporate a couple different flashes and play around. Try setting the flashes to different exposure compensation values and experiment.

For some extra fun, throw on some light modifiers like a softbox, gel, gobo, snoot or honeycomb / grid for added effects.

Share your flash stories by commenting below.

Thanks for stopping by.
Michael

10.20.2010

Nikon i-TTL-BL Flash Setting

I am by no means am I the most perfect amazing lighting master guru guy.
However, the one thing about me is that I am always trying to learn and re-learn stuff. For example, I was just recently taking a look at Nikon's micro-site all about their Creative Lighting System (CLS) and wanted to brush up on my TTL knowledge.

One thing jarred my memory and reminded me of something that I meant to write about for a while now-- the i-TTL BL setting. See way back in the early days of Nikon's TTL flash technology that I can remember (circa 2002), the BL in i-TTL stood for Back-Lit. Today, Nikon re-branded it by now referring i-TTL-BL as meaning BaLanced Fill-Flash!

Here is the definition from Nikon: "Nikon's i-TTL (intelligent through-the-lens) Balanced Fill-Flash automatically balances the output of the Nikon Speedlight and the scene's ambient light.

Immediately before the main flash goes off, the Speedlight fires a series of monitor pre-flashes, which convey Information about the scene's lighting to the camera. Combined with information from the camera's 3D Color Matrix metering system, the information is analyzed to adjust flash output to balance the scene's ambient light.

All of this complex processing happens in a fraction of a second, before each exposure, to provide unprecedented levels of flash precision and performance."

I always have my flash set to i-TTL BL with my SB-900s. Why? Because I want my lighting to be balanced with the ambient light... I found that Nikon's technology does an amazing job at "knowing" what is going on in front of it and compensating appropriately. Granted, it is just 1s and 0s and it can be fooled but so can anything else with camera technology. It is important to think in advance and realize how much light you need (and want) in your image. For example, do you want a little catch light in the eyes? Maybe a little fill flash to fill in some wrinkles or harsh shadows or maybe you want to do some dramatic lighting like the pic below:

Nikon's iTTL-BL used at a photo shoot


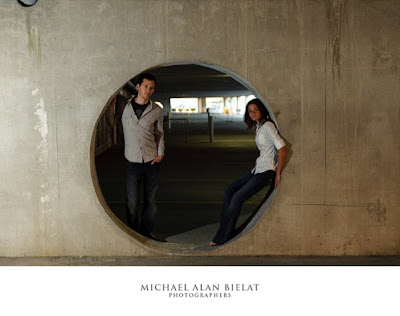
Image shot using the Nikon D700. Off Camera Flash (camera left) set to i-TTL -2ev to resemble a car headlight in this parking garage.

Attention Canon shooters: It's important to note that Canon's e-TTL II behaves in a similar way to Nikon speedlights. That's good news for you Canon flash guys.

Thanks for stopping by.
Mike

10.05.2010

Hildozine PocketWizard Caddy Review

I recently sold off most of my studio strobes in favor of using my speedlights. I have enough Nikon SB-900 speedlights to create a simple studio that is fast to set up and fast to tear down, which is great for on-location lighting.

If you have ever shot with me then you know how much I love high speed sync (Auto FP). In my opinion, this is where Nikon's speedlights and technology really excel over other camera manufacturers.

However, there are times when I want to simply shoot with my speedlights in manual mode because I want a consistent flash exposure from shot to shot. This is when I break out my trusty PocketWizard Plus II Transceiver units and hook them up to the pc sync input of my speedlights.

My only problem with this was figuring out how the heck to mount these things!

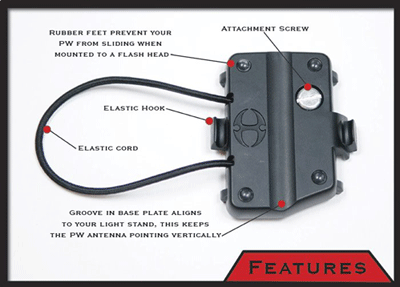
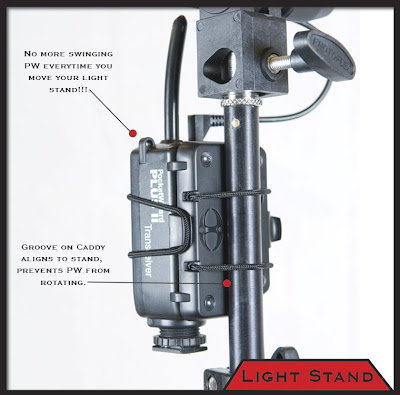
Now I use the term 'was' because I found a solution. Hildozine makes something called the PocketWizard Caddy and it securely mounts your PocketWizard to your lightstand or speedlight with ease. No messy velcro to mount on your expensive equipment and no sloppily hanging cables and devices. Plus they are only $15 each!


hildozine pocketwizard caddy review

hildozine pocketwizard caddy review

hildozine pocketwizard caddy review


The PocketWizard Caddy is essentially a plate with a elastic cord which mounts by screwing into the 1/4" thread on the PocketWizard.

The only hiccup with the design is that it covers the battery door. Granted PocketWizards seem to run forever on the same batteries, it does make for a little added hassle when you do need to replace them.

I can now mount my PocketWizard to either my speedlights or light stand with ease. No velcro all over my equipment and no mess of bungee cords and rubber bands. It is rugged and just works.

I have a total of three PocketWizards at this time and have myself two of these caddies and really love them. These are one of those products that is nice to have and is more of a convenience than anything. Hey, for $30 you can't go wrong...

Thanks for stopping by!
Mike

10.01.2010

Video Light For Photographers

Video light rocks! It's a continuous light source which means that you can physically "see" what the light is doing. From there, all you have to do is set your exposure up just as you would if you were shooting in natural light. No need to worry about your sync speed or anything related to flash photography. It is just good, quick lighting.

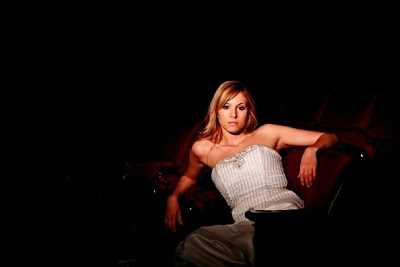
video light used by a photographer to create a dramatic portrait of a bride in a movie theater.

This shot was taken at an old movie theater in downtown Albany, NY. I used my generic Smith-Victor video light to illuminate my subject and worked the barn doors of the light to prevent light falling too far off of her. The video light puts out a decent amount of light so my settings were 1/60 sec. at f/2.8 @ ISO 800.

Thanks for stopping by!
Mike

9.30.2010

Honl Photo Traveller8 Softbox Review

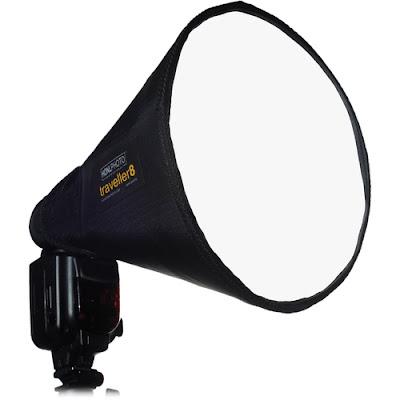
Honl Photographic was awesome enough to send me their Traveller8 Softbox for their speed strap system in preparation for my upcoming PPA Super Monday workshop on "Off-Camera Flash Techniques." I took it out for a spin and put it through its paces and am really, really, really happy with the results.

honl photo traveller8 softbox review

From HonlPhoto.com: "Create beautiful soft light from David's innovative new softbox design, with the quality and sturdiness you've come to expect from all Honl Photo Professional lighting products. Extremely easy to setup and attach to your shoe-mount flash unit using our popular Speed Strap (included). Folds flat to tuck into your camera bag, and weighs in at less than 4 ounces. Provides a pleasing circular catchlight in your subject's eyes. Fits most any shoe-mount flash by Nikon or Canon as well as larger units like the Vivitar 285."

The size of the softbox is roughly 11x9 inches folded and its look and feel is very rugged. It will definitely hold its own and I have confidence that it will not rip or tear even with me beating on it.

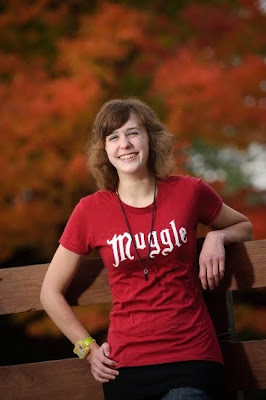
I photographed a senior portrait session over at a local park here and my setup was REAL simple. We're talking just my Nikon D700, Nikkor 70-200mm f/2.8 VR Lens, PocketWizard Plus II Transceivers, Nikon SB-900 Speedlight, Portable Light stand and the Honl Photo Traveller8 Softbox. I started shooting with a camera strap again which is nice because I can cart around my light stand with ease and throw my camera over my shoulder to free up my hands when working with my flash settings and whatnot.

Since I was using the PocketWizards, I had to shoot with my Nikon SB-900 speedlight in Manual mode. This also meant that I had to conform to my camera's maximum sync speed (1/250") and could not do any high-speed sync whatsoever.

I had to work the power of the flash, the distance between the flash and subject, ISO and Aperture to control the effect my flash had in the photo while my shutter speed simply controlled the amount of ambient light recorded. The Honl Traveller8 softbox is small enough to provide a tight light pattern on my subject and didn't really light anything that I didn't want it to. Since it is small, that also means that it won't get knocked over during windy days nearly as easy as my large 60" umbrella or 28" Westcott Apollo softbox. Due to the Traveller8's size and light pattern, I would really only use this for lighting a couple people. Any more and I would move to a larger light modifier like the 28" Apollo softbox or my 60" umbrella.

Here are some shots from the portrait session with the Traveller8 Softbox:


honl traveller8 softbox in action

sample images using honl traveller8 softbox

honl traveller8 softbox review

honl traveller8 softbox and the inLIGHTin Workshop />


The Honl Photo Traveller8 Softbox is $70 at B&H and comes packaged with a Speed Strap so that is an added bonus.

I would highly recommend this product for it's price, portability and usefulness for on-the-go lighting. I'd love to hear your thought on it if you own one too so comment below and share your experiences.

Thanks for stopping by!
Mike

9.25.2010

Thanks Honl Photographic

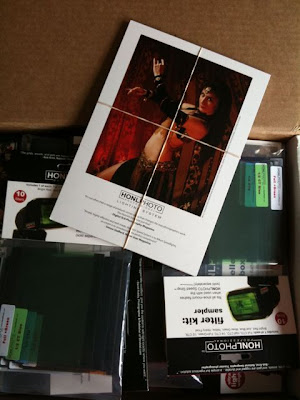
Honl Photographic was awesome enough to send over some great goodies for my upcoming PPA Super Monday Workshop all about Off-Camera Flash Techniques.

I think this means I will have to do some giveaways throughout the workshop.

This is really awesome of Honl Photographic to support the inLIGHTin Workshop like this so please check out their website at www.honlphoto.com and show some love.

Look at all the merch:

thanks to honl photographic for supporting the inlightin workshop


I hope to see you all on the 25th of October!
Mike

9.24.2010

Speedlights are awesome! They are portable and yet really robust as to what they offer. I guess that is why some of them run upwards to around $400+.

One of the features many have is the ability to zoom the flash head. Take my Nikon SB-900s for example, they can zoom from 12/17mm up to 200mm (on my DX/FX camera) which can give me a lot of variations of light. It is almost like a built-in snoot. Here's why: When the flash is mounted to the camera, it automatically zooms to match up with the lenses focal length and sends enough light to spread across the entire scene. Therefore, a wide-angle lens needs a lot of light spread out in order to light up everything properly. On the other hand, light needs to get thrown out, more like a "beam," when using a telephoto lens because it has to go further and cover less of the scene.

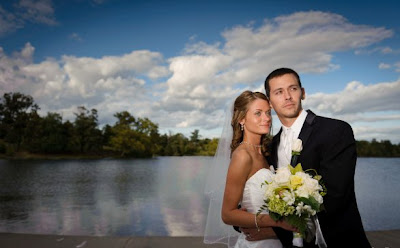
The beauty of this really comes into play when you are shooting off-camera with your flash. Take a look at the example image below:


This picture was taken at a recent wedding. I used high-speed sync to darken the background and used my flash off camera to illuminate both the bride and groom. I set the speedlight to zoom all the way up to 200mm so that it would shoot a beam of light directly on the couple's faces and fall off fairly quick. This flash was held as far out as I could in my left hand as I held my camera with my right. I used my Nikon D700's pop up flash as Commander mode only to trigger the off-camera flash for me. I believe the flash was set to +1.3ev as well. My 24-70mm lens was used here because that wide angle allows me to get in close so the flash can be close enough to hit my subjects (inverse square law 101).

Moral of the story, you don't always have time to set up and light a scene the way you want to when it comes to weddings. You have to prepare and pre-plan for these things and roll with the punches. No light stand, no softbox, no assistants holding reflectors. Just me and my flash.

Thanks for stopping by!
Mike